
Knowing how to fix a headphone cable that only works at an angle can save a perfectly good pair of headphones from the bin. The sound cuts in and out because one of the thin wires inside the cable has snapped, and it only touches again when the cable bends a certain way. The good news is that a repair with a soldering iron and a new plug takes about 30 minutes.
Quick Summary:
- Cause: a broken internal wire, usually within a few inches of the plug, the Y-split, or the earcup.
- Fix: find the damaged spot, cut it out, and rejoin the wires with solder.
- Tools needed: wire cutters, wire strippers, soldering iron, solder, a new 3.5mm plug, and heat shrink tubing.
- Time needed: about 30 minutes.
- Difficulty: beginner to intermediate.
Step-by-Step Guide to Fix a Headphone Cable That Only Works at an Angle
Most breaks happen at the plug end, because that is where the cable gets pulled, bent, and yanked from pockets. For that reason, the plug replacement below is the most common repair.
Method 1: Replace the Damaged Plug End
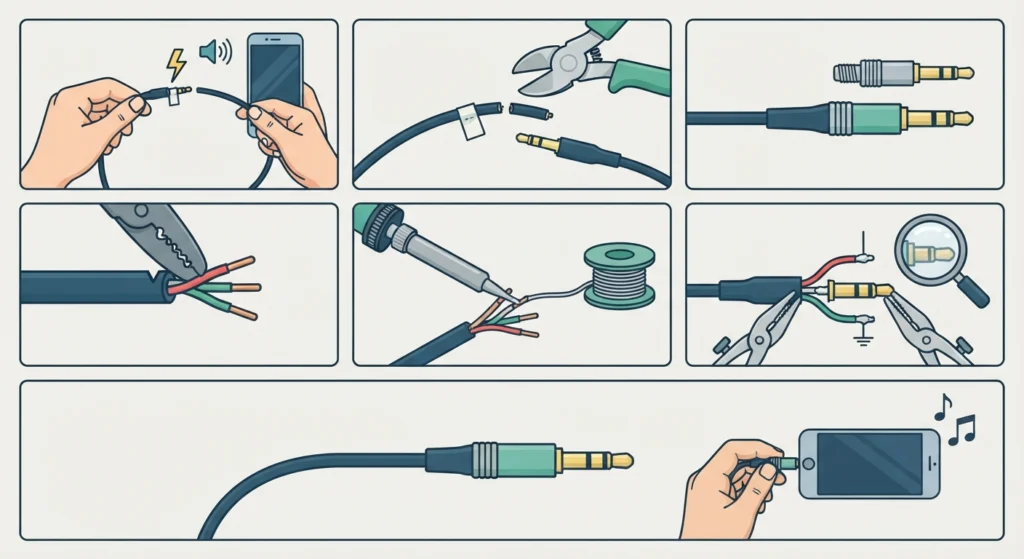
- Step 1: Play music and slowly bend the cable, starting at the plug and moving toward the Y-split. Mark the spot where the sound cuts out with a small piece of tape. Most of the time, the break sits within 2 to 3 inches of the plug.
- Step 2: Cut the cable about 2 inches past the damaged spot, so no weak wire is left behind. Remove the old plug and keep it for reference.
- Step 3: Unscrew the housing of the new 3.5mm plug and slide the housing and the spring or strain relief onto the cable. This must be done before any soldering, because the housing cannot be added afterward.
- Step 4: Strip about 1 inch of the outer jacket with the wire strippers. Be gentle, since the wires underneath are extremely thin. Inside are two or three thin wires, plus a bundle of bare strands that acts as the ground.
- Step 5: Most headphone wires are coated in colored enamel, which blocks solder. Hold the tip of a hot soldering iron against each wire for a few seconds, or gently scrape the enamel off, until the copper shows. Then add a thin layer of solder to each wire. This is called tinning.
- Step 6: For a standard 3-conductor plug, the tip carries the left channel, the middle ring carries the right channel, and the sleeve carries the ground. Solder each wire to its matching contact. If the headphones have a microphone, the plug has four sections, so match the wiring to the old plug or test each wire with a multimeter.
- Step 7: Make sure no stray strands touch the neighboring contacts. Then screw the housing back on and plug the headphones in. Play music and bend the cable around the plug to confirm the sound stays steady.
Pro-Tip: Always slide the plug housing and strain relief onto the cable before soldering. This is the most common mistake in plug repairs, and it forces a redo of the whole job.
Method 2: Repair a Break Near the Y-Split or Cable Middle
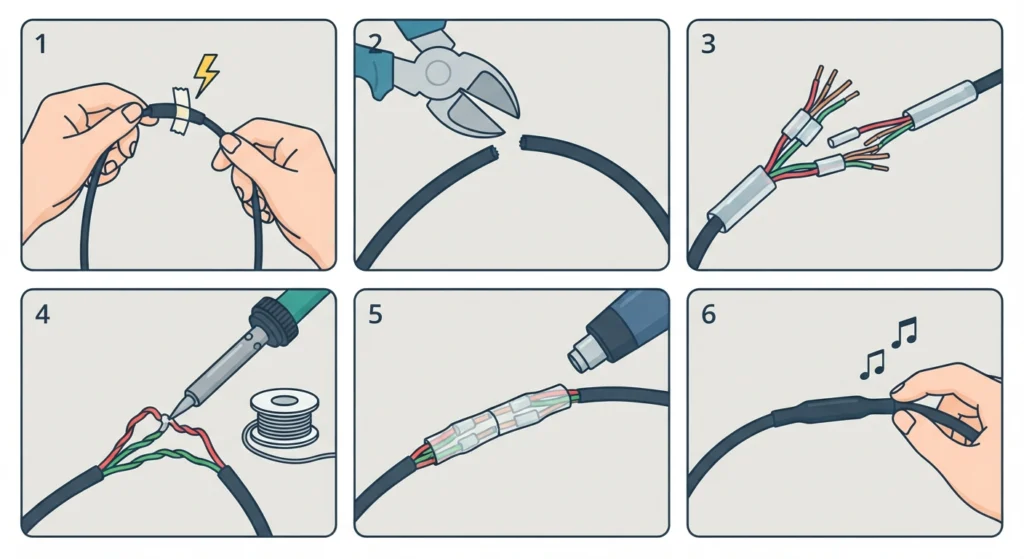
If the sound cuts out when the cable is bent near the Y-split or the middle of the cable, the plug is fine and the cable needs a splice instead.
- Step 1: Locate the damaged section by bending the cable while music plays, then mark it.
- Step 2: Cut out about 1 inch around the break, creating two clean ends.
- Step 3: Slide a piece of heat shrink tubing over each wire pair before joining anything, then strip about half an inch of the jacket from both ends.
- Step 4: Remove the enamel from each wire and tin it, then twist together the matching wires from both ends and solder each pair. Match the colors on both sides so left connects to left, right to right, and ground to ground.
- Step 5: Slide a small piece of heat shrink over each soldered joint and heat it, so no joint touches another. Then slide a larger piece over the whole repair and heat that as well.
- Step 6: Test the cable by bending it near the repair while music plays.
A break right at the earcup is different, because it means opening the earcup and resoldering the wires to the driver. That repair varies a lot between models, so the earcup design should be checked first.
Tips for a Lasting Repair
- Use a soldering iron around 350 degrees Celsius and keep the tip clean. A dirty tip makes solder bead up instead of flowing.
- Keep each solder joint short, about 2 to 3 seconds. Too much heat can melt the insulation on the neighboring wires.
- A third hand tool or a small clamp makes it much easier to hold the plug steady while soldering.
- Tug lightly on every wire after soldering. A good joint will not move.
- Fit the strain relief snugly. It spreads the bending force along the cable, which is exactly what prevents the same break from returning.
Pro-Tip: Before closing the plug housing, check that the bare ground strands are not touching the left or right contacts. A single stray strand can cause crackling or sound in only one ear.
Common Problems After the Repair
Fix 1: Sound Only in One Ear
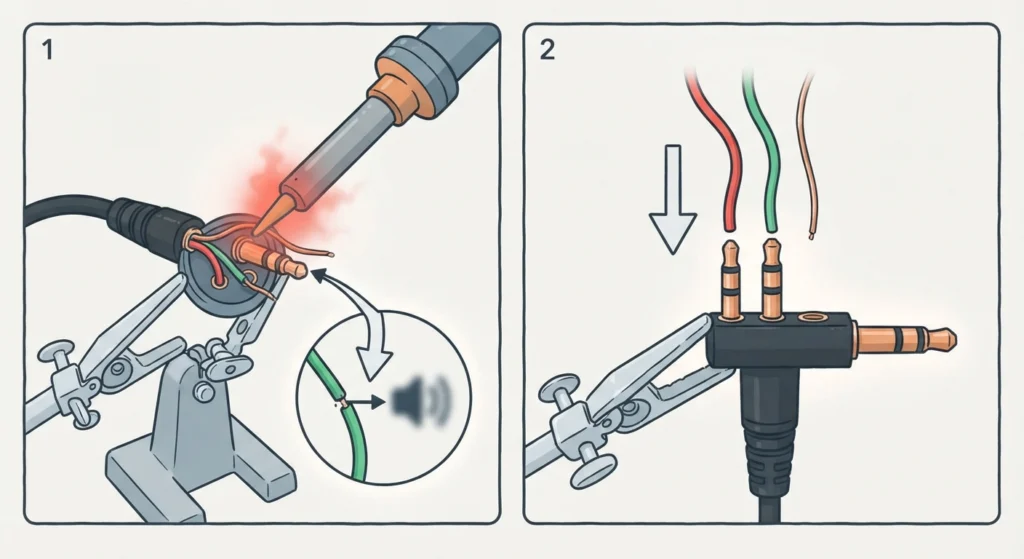
One of the channel wires is likely loose or soldered to the wrong contact. Reheat the joint and confirm that the left wire is on the tip and the right wire is on the middle ring.
Fix 2: Crackling or Static
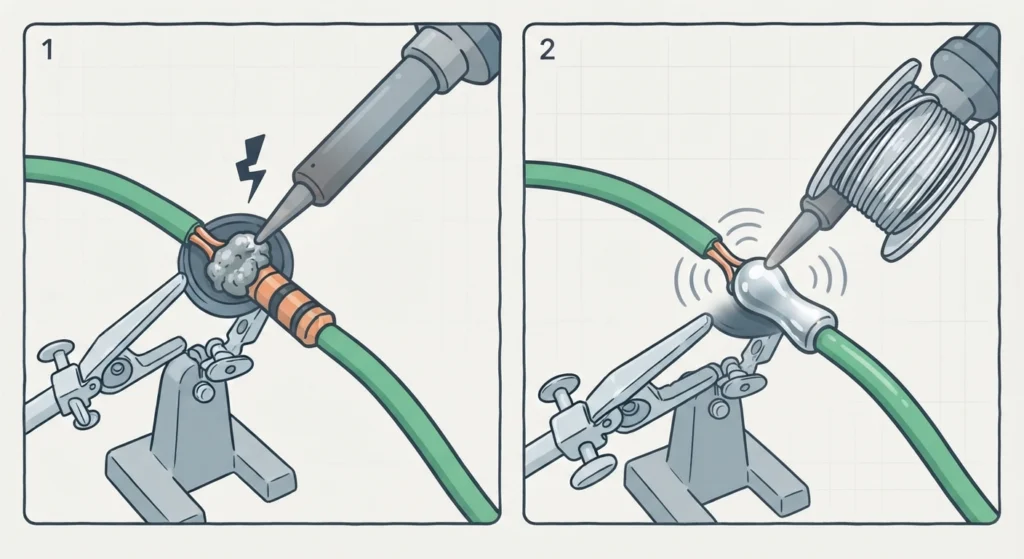
This usually points to a cold solder joint, which looks dull and lumpy instead of shiny. Reheat it and add a small amount of fresh solder.
Fix 3: Microphone Not Working
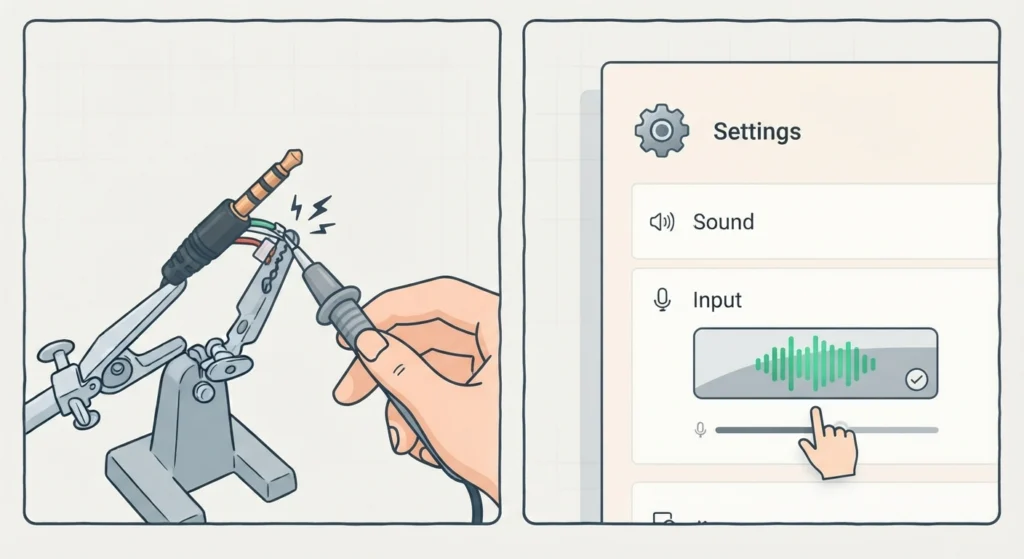
On headsets with a mic, the wires may be swapped on the four-section plug. On a Windows 11 PC, the guides on resolving microphone detection problems and managing audio input devices help confirm whether the issue is the wiring or a software setting.
Fix 4: No Sound at All
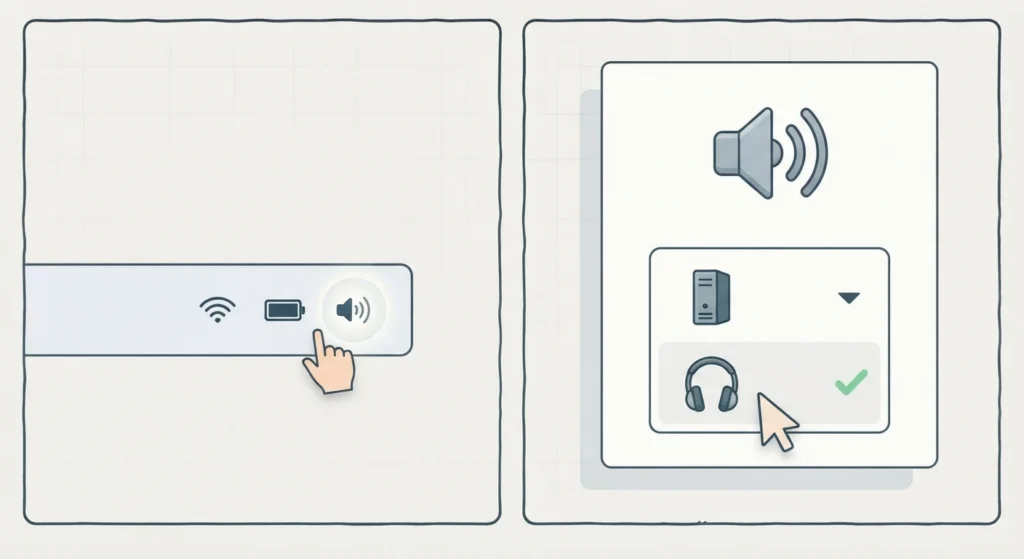
The problem may be the audio output setting rather than the repair. On Windows 11, the steps for adjusting audio output settings make sure the headphones are selected as the playback device.
Frequently Asked Questions
Why does a headphone cable only work at an angle?
One of the thin copper wires inside the cable has broken. At certain angles the broken ends touch again, so sound returns, and when the cable straightens, the connection is lost.
Where do headphone cables usually break?
Most breaks happen near the 3.5mm plug, the Y-split, or where the cable enters the earcup, because these points take the most bending and pulling.
Can a headphone cable that only works at an angle be repaired?
Yes. In most cases the damaged section can be cut out and the wires rejoined with solder, or the plug can be replaced with a new one.
What tools are needed for the repair?
The basic kit is wire cutters, wire strippers, a soldering iron, solder, a new 3.5mm plug, and heat shrink tubing. A multimeter is helpful but not required.
How long does the repair take?
A first-time repair usually takes about 30 to 45 minutes. With practice it takes much less.
Why won’t the solder stick to the headphone wires?
Most headphone wires have a thin enamel coating. The enamel must be burned or scraped off before the solder will bond to the copper.
Does the wire order matter on a 3.5mm plug?
Yes. On a standard stereo plug, the tip is the left channel, the middle ring is the right channel, and the sleeve is the ground. Swapping them can cause missing sound or noise.
Is it worth repairing cheap headphones?
For inexpensive earbuds, replacement is often easier. For headphones with good drivers or a detachable cable, repair is usually worth the effort.
Can electrical tape fix a broken headphone wire?
No. Tape only holds the cable in place and does not restore the broken connection inside, so a soldered repair is the reliable fix.
How can another break be prevented?
Avoid pulling on the cable to unplug the headphones, and do not wrap the cable tightly around a phone or player. A snug strain relief at the plug also helps.