
Beats Solo Buds sound cutting out mid-song is annoying, but the cause is usually a simple Bluetooth hiccup rather than a broken earbud. This step-by-step guide covers the fixes that work, starting with the quickest.
Key Takeaways
- Most dropouts come from a weak Bluetooth link, so the quick fixes below solve the problem more often than not.
- Putting both buds back in the case and taking them out again is the fastest first move.
- A full reset, followed by a fresh pairing, clears most stubborn glitches.
- The case of the Beats Solo Buds has no battery of its own, so it needs to be connected to power to charge the buds.
Step-by-Step Guide to Stop Beats Solo Buds Sound Cutting Out
Work through these fixes in order. Test playback for a couple of minutes after each one, because there is no point doing more than needed.
Fix 1: Reset the Connection by Using the Case
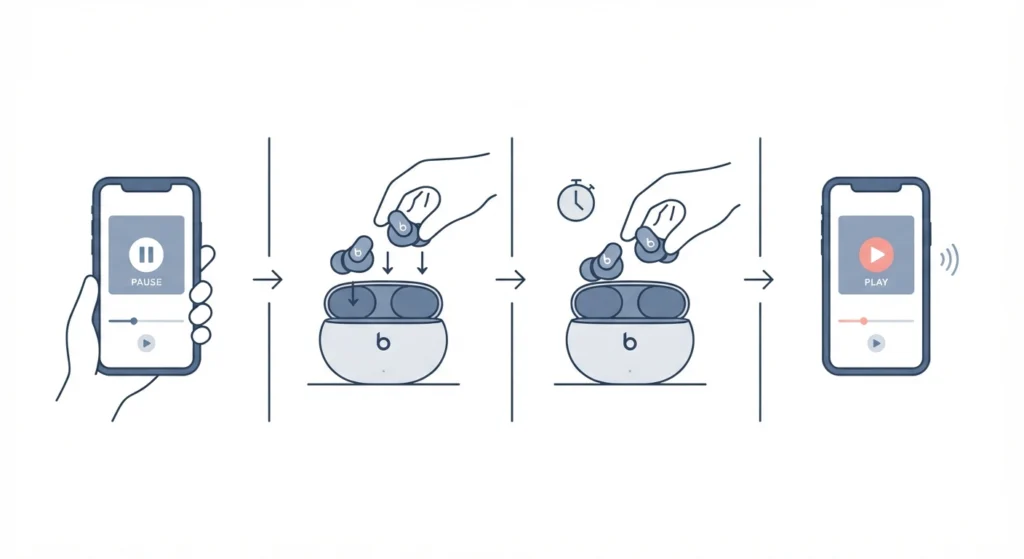
Apple’s own quick troubleshooting for Solo Buds sound problems starts here. It takes about ten seconds and clears many small glitches.
- Step 1: Pause the audio on the phone, tablet, or computer.
- Step 2: Place both earbuds back into the charging case.
- Step 3: Take both buds out again and wait a few seconds for them to reconnect.
- Step 4: Resume playback and listen for dropouts.
Fix 2: Remove Bluetooth Interference
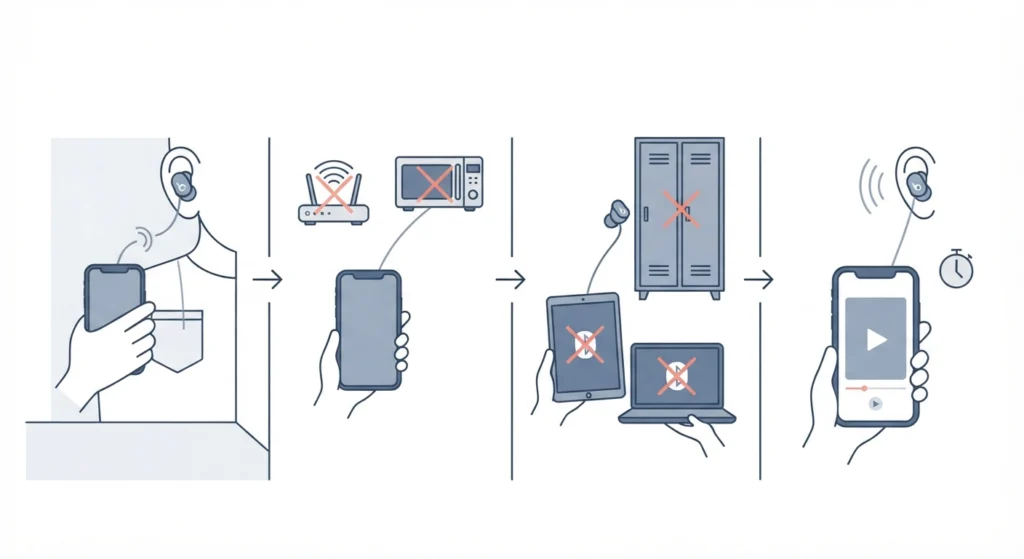
Bluetooth is a short-range signal, and it behaves a lot like a quiet conversation in a busy room. Walls, crowds, and other wireless gear can drown it out.
- Step 1: Keep the connected device close, ideally in the same pocket or hand, instead of a bag across the room.
- Step 2: Move away from busy Wi-Fi routers, microwaves, and large metal objects.
- Step 3: Turn off Bluetooth on devices that are not in use so the buds are not competing for the connection.
- Step 4: Play audio again for a few minutes to check if the dropouts are gone.
Fix 3: Update the Connected Device
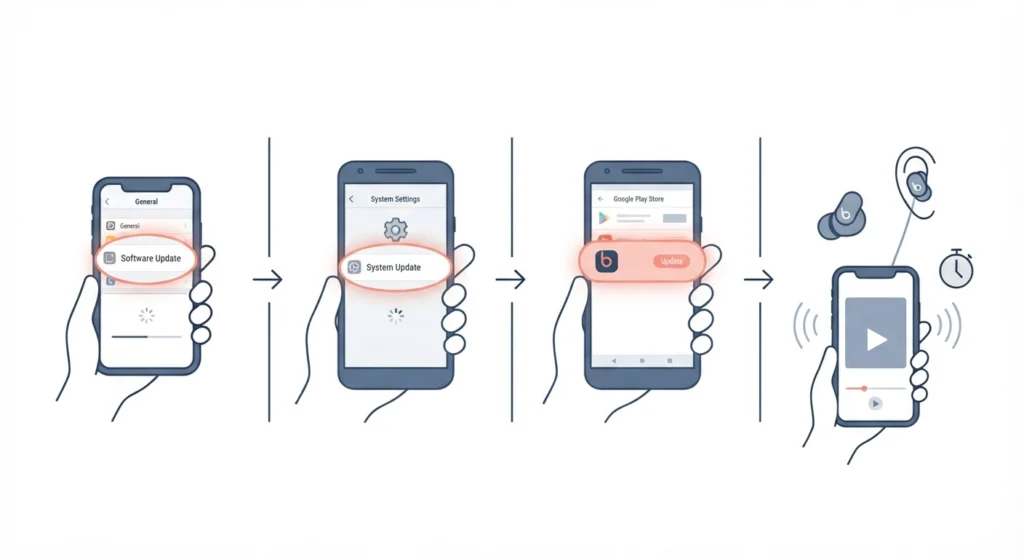
Apple recommends making sure the device paired with the Beats is fully up to date before anything else. Outdated phone software can cause unstable audio connections.
- Step 1: On iPhone or iPad, open Settings, tap General, then Software Update, and install anything pending.
- Step 2: On Android, open Settings, search for system update, and install any available update.
- Step 3: On Android, also update the Beats app from the Play Store.
- Step 4: Reconnect the Solo Buds and test playback.
Fix 4: Forget the Buds and Pair Them Again
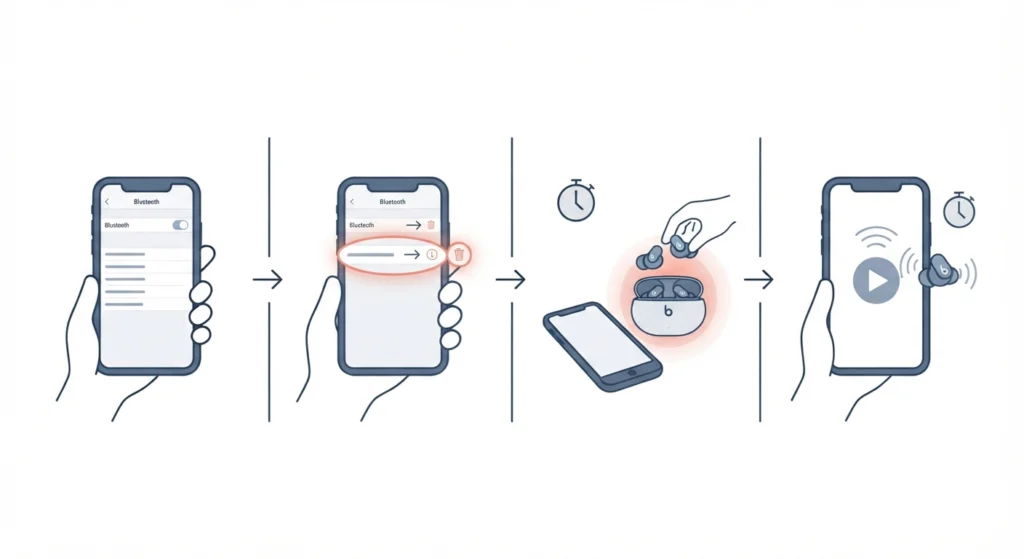
Sometimes the saved pairing gets corrupted. Removing it and starting fresh gives the connection a clean slate.
- Step 1: Open the Bluetooth settings on the device.
- Step 2: Find the Beats Solo Buds in the list and choose the option to forget or remove the device (on iPhone, tap the info icon next to the buds first).
- Step 3: Place both buds in the case and open the lid near the device.
- Step 4: Follow the on-screen pairing prompt, then play audio to test the connection.
Fix 5: Fully Reset the Beats Solo Buds
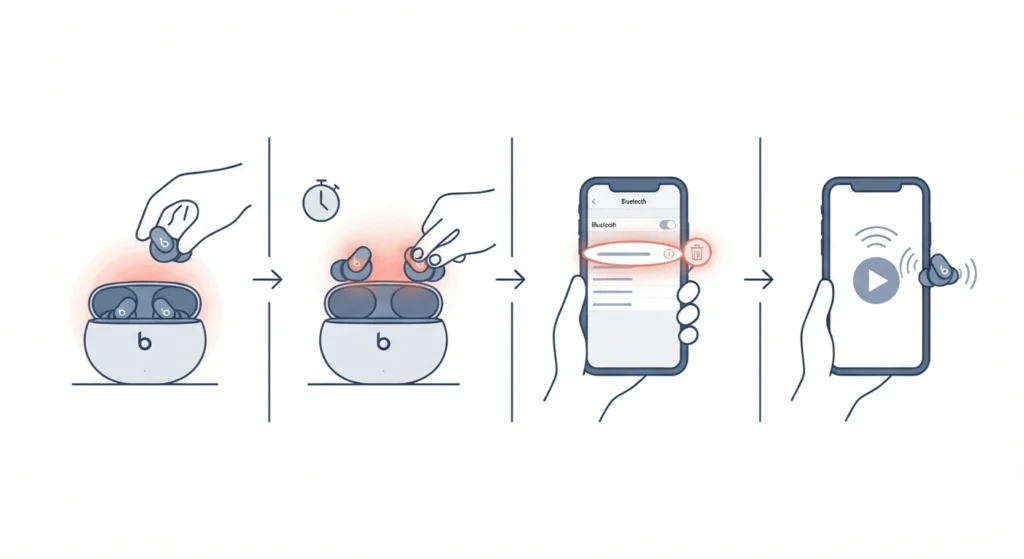
When the earlier fixes do not hold, a full reset is the strongest software-side fix. Apple lists it as the go-to step for sound, pairing, and charging issues.
- Step 1: Place both earbuds in the case and leave the case open.
- Step 2: Press and hold the button above the Beats logo on both earbuds for at least 10 seconds.
- Step 3: Release the buttons, then forget the old pairing on the device if it is still listed.
- Step 4: Pair the buds again and test playback.
Pro-Tip: Always remove the old Beats entry from the device’s Bluetooth list after a reset. A reset wipes the pairing on the buds, but the phone or laptop may still hold the old one, and that mismatch is a common reason the sound keeps dropping after a reset.
Fix 6: Charge the Buds Properly
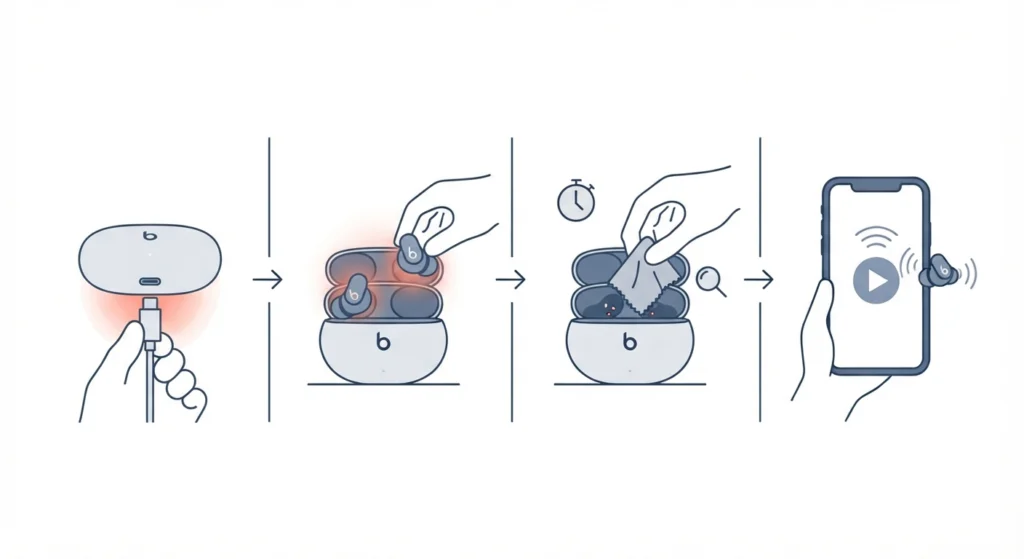
Low battery can make audio stutter or disconnect. The Solo Buds case has no battery of its own, so charging works a little differently from most earbuds.
- Step 1: Connect the case to a power source with a USB-C cable.
- Step 2: Seat both earbuds firmly in the case so they sit flat against the charging contacts.
- Step 3: Wipe the earbud and case contacts gently with a dry, soft cloth if they look dirty.
- Step 4: Let the buds charge for a while, then test playback again.
Fix 7: Repair the Audio Settings on a Windows PC
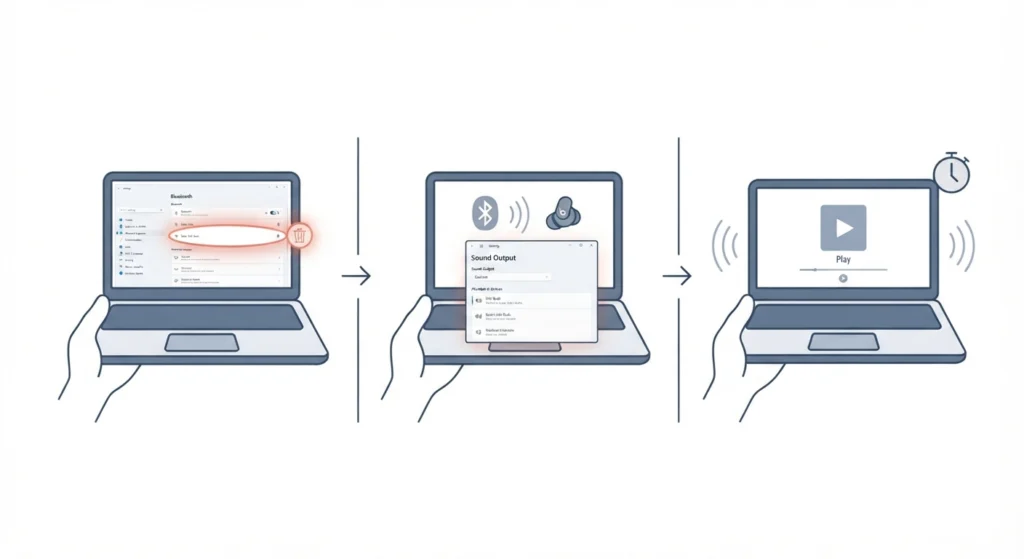
If the dropouts only happen on a Windows computer, the buds are usually fine and the PC settings are the culprit. Re-pairing the buds can help, and this guide on how to re-pair Bluetooth earbuds for stereo sound on Windows walks through it. Output settings matter just as much, so it also helps to check the steps for adjusting audio output settings in Windows 11 and make sure the Solo Buds are selected as the playback device.
- Step 1: Remove the Solo Buds from the Bluetooth devices list in Windows.
- Step 2: Pair them again and choose them as the default output device.
- Step 3: Play audio for a few minutes to confirm the sound stays steady.
Tips to Keep the Sound Stable
- Return the buds to the case whenever they are not in use so they stay charged and ready.
- Keep the phone on the same side of the body as the buds when walking, since the body can block the signal.
- Restart the connected device now and then to clear temporary Bluetooth glitches.
- Avoid pairing the buds with too many devices at once, which can cause confusion about which one should connect.
- Try a different audio app or song source to see whether the problem is with the app and not the buds.
Common Problems and Quick Solutions
Only One Earbud Keeps Cutting Out
Return both buds to the case, take them out, and run the full reset in Fix 5. The reset needs to be done on both earbuds so they sync properly with each other.
Sound Cuts Out Only in Crowded Places
Busy areas have lots of wireless signals. Keep the phone close to the body and out of a bag until the connection settles.
Sound Cuts Out After Every Reset
The old pairing is probably still saved on the device. Forget the buds from the Bluetooth list, then pair them again from scratch.
Frequently Asked Questions
Why do my Beats Solo Buds keep cutting out?
The most common reasons are a weak Bluetooth connection, interference from nearby devices, outdated phone software, or a corrupted pairing. The fixes above address each of these.
Do the Beats Solo Buds have a battery in the case?
No. The case does not have a battery, so it needs to be connected to power to charge the earbuds.
How do I reset Beats Solo Buds?
Place both earbuds in the case with the lid open, then press and hold the button above the Beats logo on both earbuds for at least 10 seconds.
Will resetting the buds delete my music or data?
No. A reset only clears the pairing and connection settings on the earbuds. Music and files stay on the phone or computer.
Can Bluetooth interference really cause sound dropouts?
Yes. Wi-Fi routers, microwaves, and crowded wireless environments can disturb the Bluetooth signal and cause short breaks in audio.
Do the Solo Buds work with Android phones?
Yes. They pair with Android devices through Bluetooth, and the Beats app for Android is available for extra control and updates.
Why does the sound cut out only on my Windows laptop?
This usually points to a pairing or output setting problem on the laptop. Removing the buds from the Bluetooth list, pairing again, and selecting them as the default playback device usually fixes it.
How long should I test the buds after a fix?
Play audio for at least two minutes and walk a few steps away from the device. If the sound stays steady, the fix worked.
Should both earbuds be reset at the same time?
Yes. Both earbuds should be in the case with the lid open, and the button on each earbud should be held for at least 10 seconds.
What if the sound still cuts out after trying every fix?
Contact Apple Support, since persistent dropouts after a reset can point to a hardware issue that needs inspection.