
Baseus Bowie MA10 not charging in the case is one of the most common complaints among true wireless earbud users, and the good news is that most of the time, the fix takes only a few minutes. This guide walks through the exact steps needed to get the earbuds charging again, without wasting time on unrelated troubleshooting.
Key Takeaways
- Dirty or misaligned charging contacts are the most common reason the case fails to charge the earbuds.
- A weak or faulty charging cable is often mistaken for a defective case.
- A factory reset resolves charging issues caused by firmware glitches.
- Protective plastic film left on new earbuds can block the charging pins entirely.
- Most fixes take less than 10 minutes and require no tools.
Method 1: Check the Charging Cable and Power Source
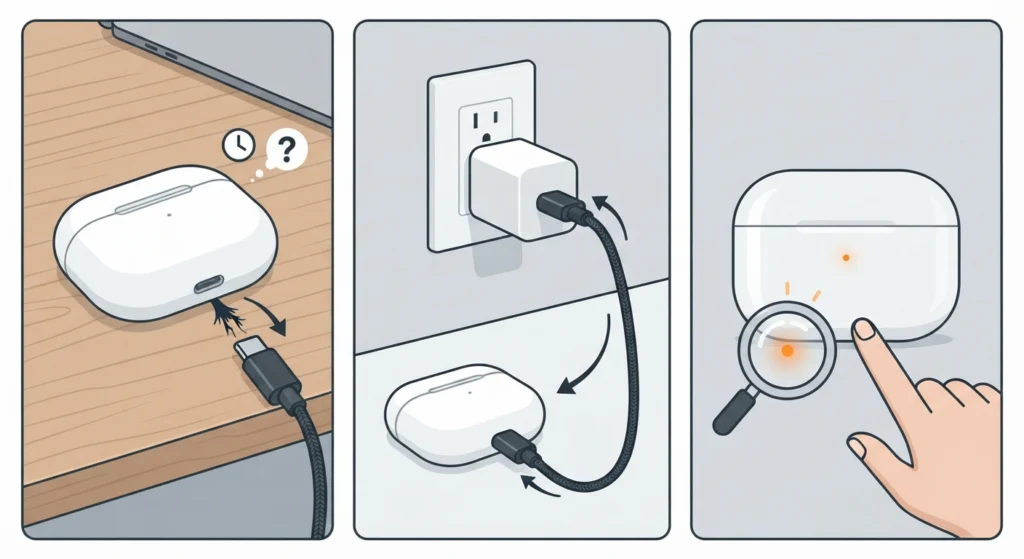
Before assuming the case itself is broken, it helps to rule out the simplest cause first. A worn-out cable or a weak power adapter can easily be mistaken for a charging case malfunction.
- Step 1: Unplug the current charging cable and swap it with a different USB-C cable that is known to work.
- Step 2: Connect the case to a wall adapter instead of a laptop or power bank, since some USB ports do not supply enough current.
- Step 3: Watch the case indicator light for a few seconds after plugging it in to see if it responds at all.
This works best when tested with a cable rated for data and charging, not a charge-only cable, since some thinner cables cannot deliver stable power.
Method 2: Clean the Charging Contacts
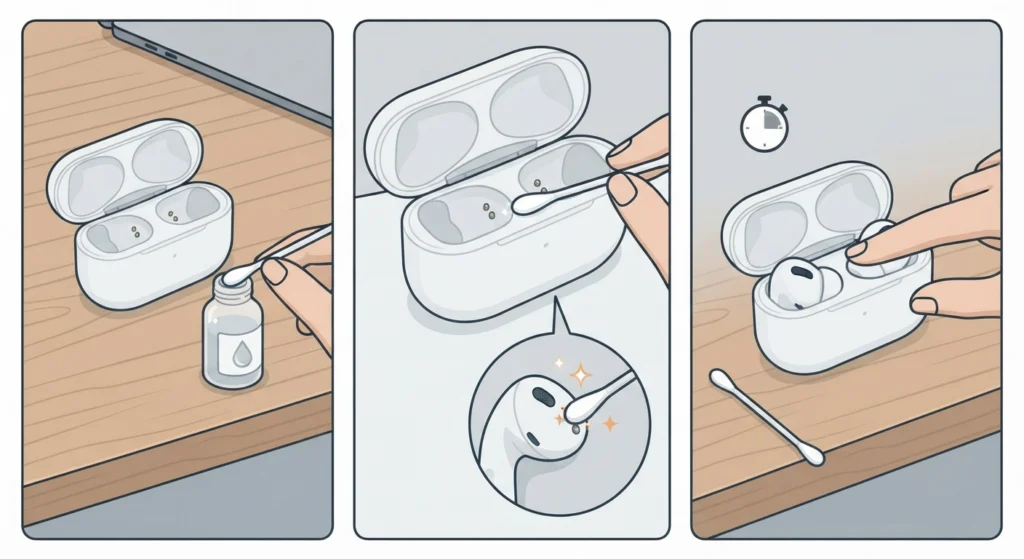
The metal charging pins inside the case and on the earbuds themselves are small, which means dust, lint, or earwax residue builds up faster than most people expect. Even a thin layer of grime is enough to break the connection.
- Step 1: Dip a cotton swab in a small amount of isopropyl alcohol.
- Step 2: Gently wipe the metal contact points inside the case and on the bottom of each earbud.
- Step 3: Let the contacts air dry for at least two minutes before placing the earbuds back inside.
Pro Tip: Avoid using excess alcohol or a soaking wet swab, since liquid seeping into the earbud housing can cause more damage than the dirt it was meant to remove.
Method 3: Remove the Protective Film
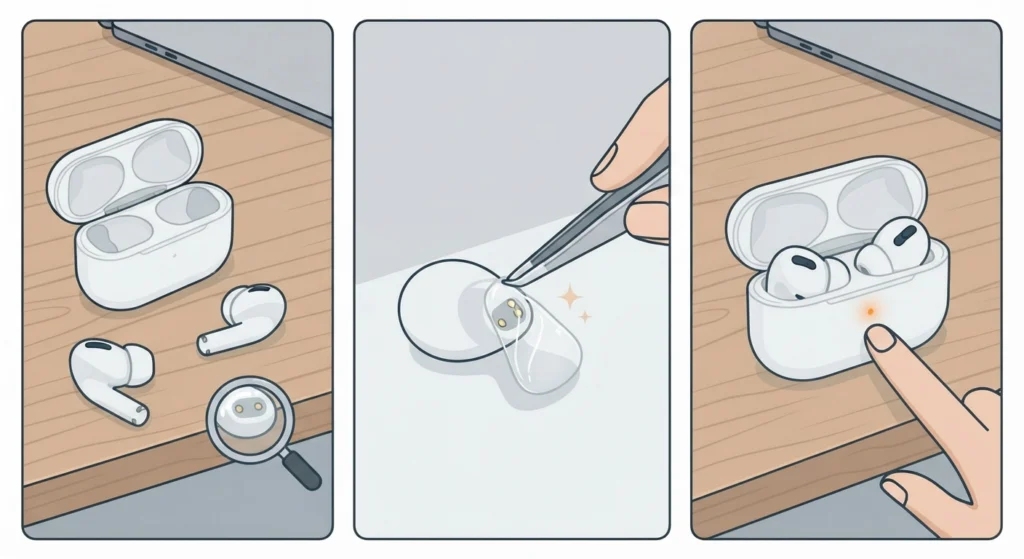
This is a fix that catches a lot of new users off guard. Brand new earbuds sometimes ship with a thin plastic film covering the charging contacts to protect them during shipping, and it is easy to miss since it is nearly transparent.
- Step 1: Take both earbuds out of the case and inspect the bottom where the charging pins are located.
- Step 2: Look closely for a thin, clear film that may still be covering the metal contacts.
- Step 3: Peel it off carefully with a fingernail or tweezers if found.
- Step 4: Place the earbuds back in the case and check if the charging light turns on.
Method 4: Reset the Charging Case and Earbuds
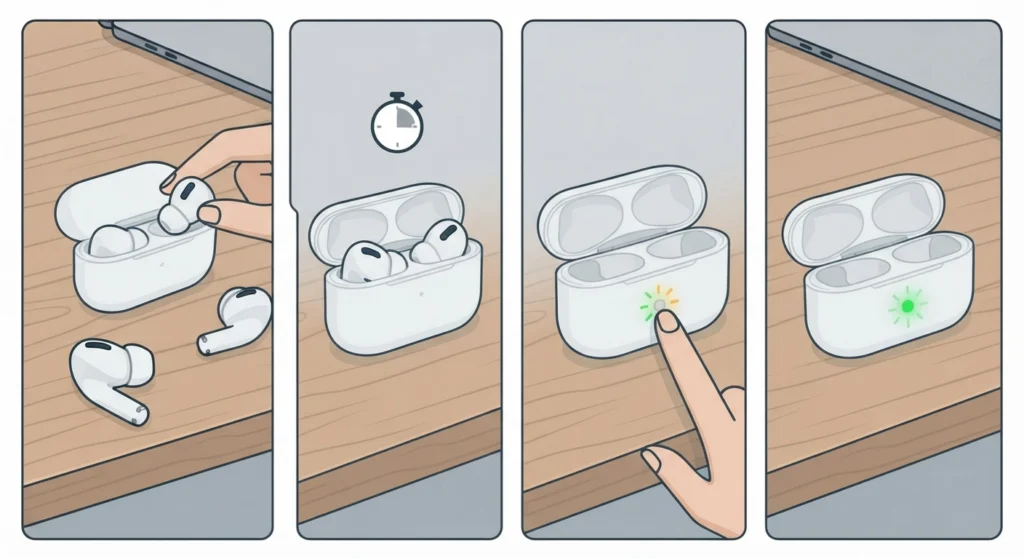
A soft reset clears out minor firmware glitches that sometimes prevent the case from recognizing the earbuds are seated correctly.
- Step 1: Place both earbuds in the case and close the lid.
- Step 2: Wait about 15 to 20 seconds before opening the lid again.
- Step 3: Open the lid and press the button on the case for around 10 seconds until the indicator light flashes.
- Step 4: Release the button and allow the earbuds to reboot before checking the charging status.
Once the reset is complete, pairing the earbuds again is usually necessary. A full walkthrough on how to re-pair Bluetooth earbuds for stereo sound on a Windows device makes this part quick and painless.
Method 5: Reposition the Earbuds Correctly
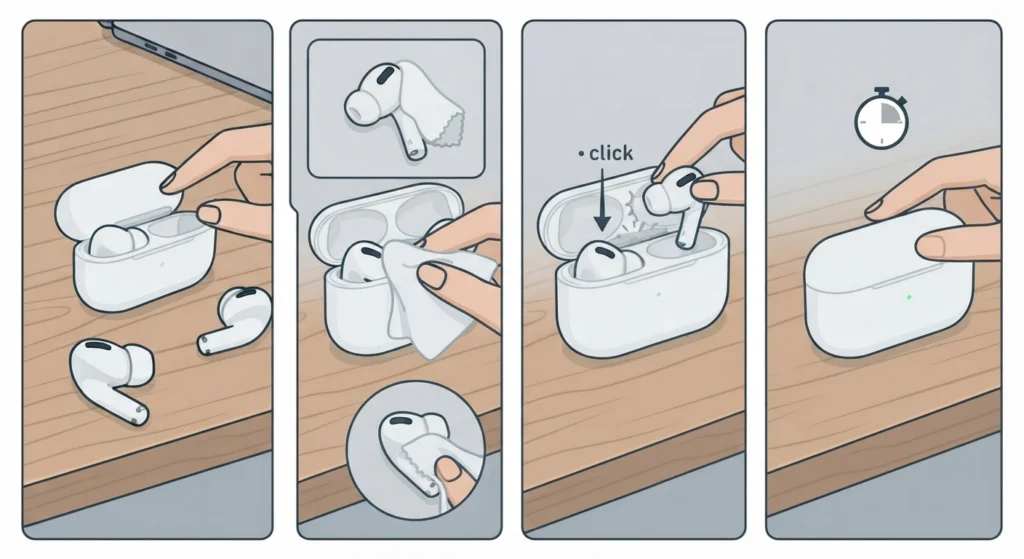
Most people find that charging issues come down to something as simple as the earbuds not sitting flush against the contact points. The magnets inside the case are designed to guide them into place, but a loose fit or leftover moisture can throw that off.
- Step 1: Remove both earbuds from the case completely.
- Step 2: Dry the earbuds and the inside of the case with a soft, lint-free cloth if any moisture is present.
- Step 3: Place each earbud back in slowly, pressing down gently until it clicks or settles fully into the slot.
- Step 4: Close the lid and reopen it after a minute to check for a charging indicator.
Method 6: Check the Case Battery Level
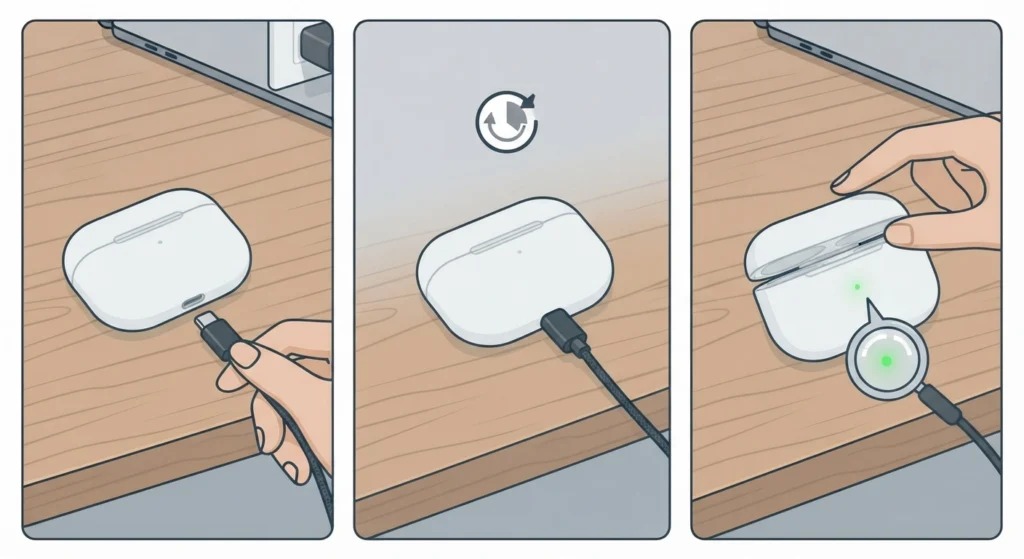
The key is to remember that the charging case has its own internal battery, separate from the earbuds. If the case itself is fully drained, it cannot pass power to the earbuds no matter how clean the contacts are.
- Step 1: Plug the case into a working power source using a reliable cable.
- Step 2: Leave it charging undisturbed for at least 30 minutes before checking again.
- Step 3: Check the case indicator light to confirm it is actively charging rather than idle.
Helpful Tips to Keep the Case Charging Reliably
- Store the case in a dry place, since humidity speeds up corrosion on the charging pins.
- Avoid leaving the case in direct sunlight or a hot car, as heat affects battery performance over time.
- Wipe the contacts every few weeks as routine maintenance rather than waiting for a problem to appear.
- Use the original cable or a certified replacement instead of unbranded alternatives.
- Close the lid fully after each use to prevent dust from settling on the pins.
Common Problems and Troubleshooting
Some charging issues go beyond a quick clean or reset. These are the situations worth knowing about before assuming the case needs a replacement.
- Only one earbud charges: This usually points to a dirty contact on the earbud that is not charging, or slight misalignment inside the case. Cleaning that specific earbud and its slot resolves this in most cases.
- Case light does not turn on at all: This can mean the case battery is completely drained, or the cable and power source being used are not delivering enough current.
- Earbuds charge but will not pair: Charging and pairing are separate systems, so this typically means the Bluetooth connection needs to be refreshed rather than the charging hardware.
- Case feels warm during charging: Mild warmth is normal, but excessive heat paired with no charging progress suggests the battery inside the case may be degrading.
Pro Tip: If only one earbud consistently fails to charge across multiple attempts, that earbud’s battery is more likely the root cause rather than the case itself.
Frequently Asked Questions
Why is the Baseus Bowie MA10 case not charging the earbuds?
The most common causes are dirty charging contacts, a weak charging cable, leftover protective film on new units, or a drained case battery.
How long does it take to fully charge the Baseus Bowie MA10 case?
A fully drained case typically takes around 1.5 to 2 hours to reach a full charge using a standard USB-C cable and adapter.
Can a damaged cable cause the earbuds to stop charging?
Yes. A frayed or low-quality cable often fails to deliver consistent power, which looks identical to a case malfunction from the outside.
Is it normal for only one earbud to charge while the other does not?
This is common and usually traced back to a dirty contact point or slight misalignment rather than a hardware failure.
What should be done if resetting the earbuds does not fix the charging issue?
After a reset, checking the cable, cleaning the contacts, and confirming the case has power are the next logical steps before considering a warranty claim.
Does using a third-party charging cable damage the case?
A poor-quality cable will not usually cause damage, but it can deliver inconsistent power that prevents proper charging altogether.
How can it be confirmed that the case itself is charging?
Plugging the case in and watching for an active indicator light response within the first few seconds confirms the case is receiving power.
Why does the case light flicker instead of staying solid while charging?
A flickering light during charging often points to a loose cable connection or a contact point that needs cleaning.
Can moisture inside the case cause charging problems?
Yes. Moisture on the contact points interferes with the electrical connection needed to charge the earbuds properly.
What is the best way to prevent future charging issues?
Regular cleaning of the contacts, using a reliable cable, and storing the case away from heat and humidity prevents most recurring charging problems.