Key Takeaways
- A faulty or incompatible USB-C cable is the most common reason the 1More SonoFlow stops charging.
- Debris inside the charging port can block the connection – cleaning it out often solves the issue instantly.
- A firmware or software glitch can prevent charging, and a factory reset usually clears it.
- Leaving the headphones fully drained for extended periods can cause the battery to enter a deep discharge state.
- If none of the fixes work, contacting 1More support for a warranty claim is the recommended next step.
The 1More SonoFlow not charging is one of those frustrating moments that can catch anyone off guard – especially before a long commute or a workout session. The good news is that most charging issues are not hardware failures. They are usually caused by something simple like a bad cable, a dirty port, or a firmware hiccup. This step-by-step guide covers every practical fix to get the SonoFlow charging again without guesswork.
How to Fix 1More SonoFlow Not Charging
Fix 1: Check and Replace the USB-C Cable
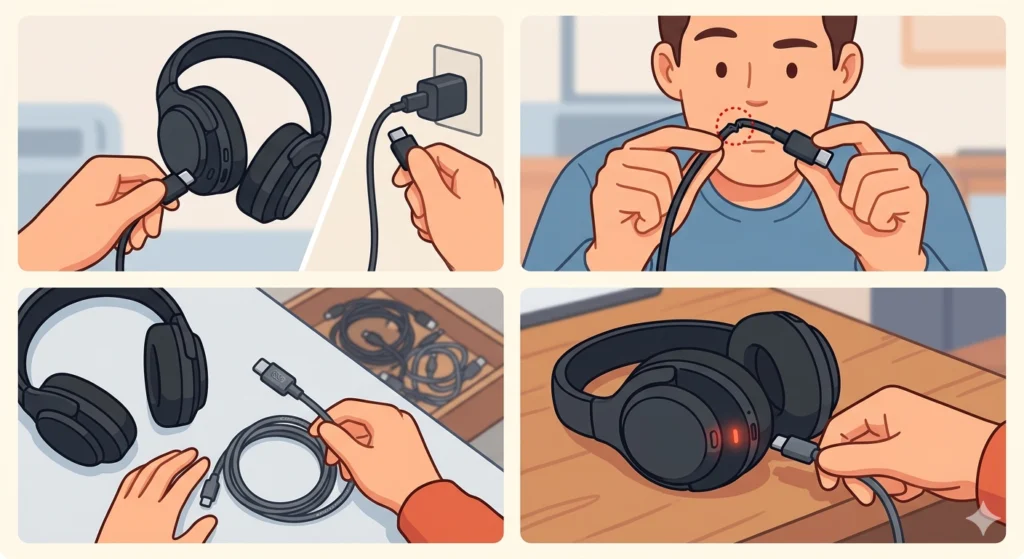
The charging cable is almost always the first place to look. Not all USB-C cables are built the same – some are data-only and cannot deliver proper charging current. Even a cable that looks fine physically can have broken internal wires from repeated bending near the connector.
- Step 1: Disconnect the cable from both the headphones and the power source.
- Step 2: Inspect the cable for any visible damage, kinks, or fraying near the ends.
- Step 3: Try a different USB-C cable – ideally the one that originally came with the SonoFlow or a certified charging cable.
- Step 4: Reconnect and check if the charging indicator light turns on.
This works best when the replacement cable is a known good cable from another device. The key is to rule out the cable completely before moving on.
Fix 2: Try a Different Power Source
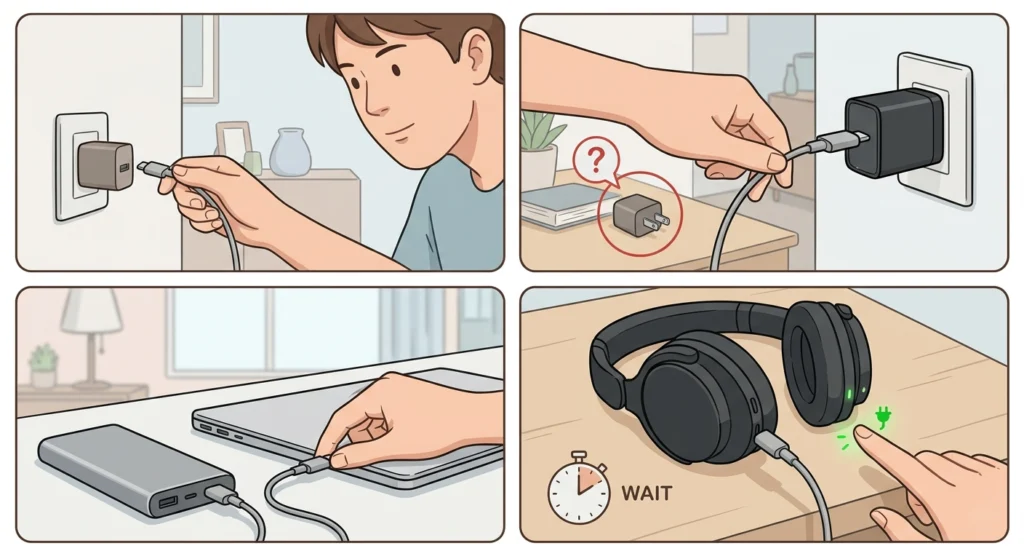
Sometimes the issue is not with the headphones at all – it is the power adapter or USB port being used. A USB port on an older laptop or a cheap wall adapter may not supply enough power to trigger the charging circuit on the SonoFlow.
- Step 1: Unplug the cable from the current power source.
- Step 2: Try plugging into a wall adapter with at least 5V/1A output.
- Step 3: Alternatively, try a USB port on a different computer or a power bank.
- Step 4: Wait 2-3 minutes and check for any charging indication on the headphones.
Fix 3: Clean the Charging Port
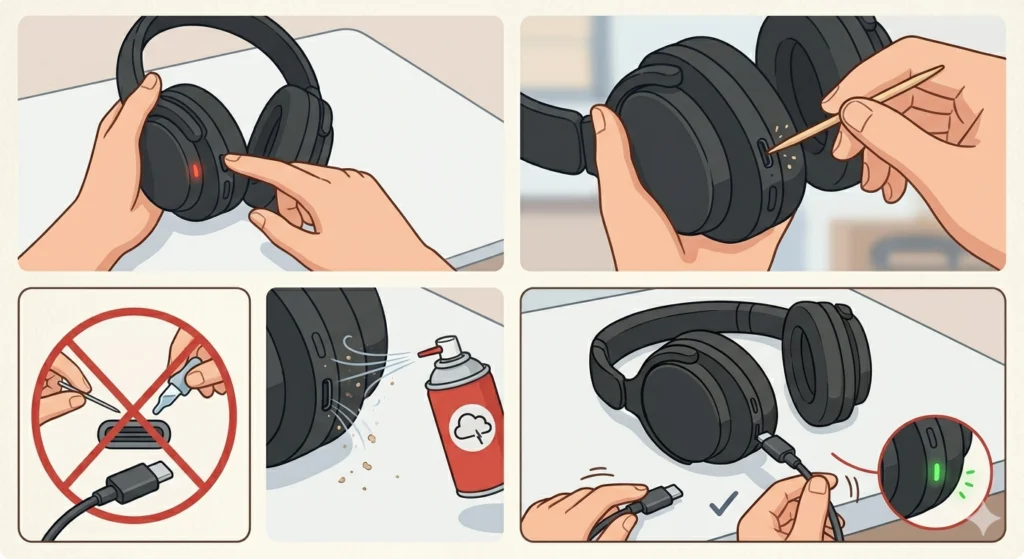
Dust, lint, and pocket debris are notorious for getting packed into USB-C ports over time. Even a thin layer of buildup can prevent the cable from making a proper connection. Most people find that this is the culprit when the cable seems to fit loosely or wobbles when plugged in.
- Step 1: Power off the SonoFlow completely before cleaning.
- Step 2: Use a dry toothpick or a soft-bristled brush to gently loosen any debris inside the port.
- Step 3: Use a can of compressed air to blow out any remaining particles – keep the nozzle a few centimeters away from the port.
- Step 4: Avoid using metal objects or liquids inside the port, as these can damage the charging pins.
- Step 5: Plug the cable back in and check if the connection feels more secure.
Pro-Tip: Always clean the charging port in a well-lit area. Shining a small flashlight into the port first can reveal exactly how much debris is packed inside before reaching for any cleaning tool.
Fix 4: Perform a Hard Reset on the SonoFlow
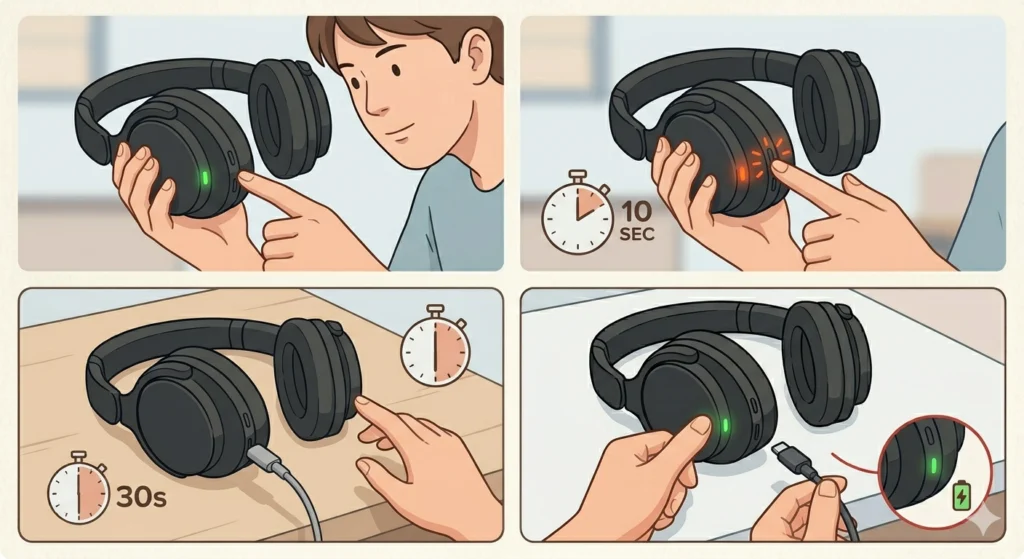
A firmware glitch or an internal software error can sometimes freeze the charging management system on the headphones. A hard reset clears this state and restores normal operation. This is one of the most effective fixes when the hardware looks physically fine but the headphones simply refuse to charge.
- Step 1: Make sure the headphones are powered on if they still have some battery remaining.
- Step 2: Press and hold the power button for approximately 10 seconds until the LED indicator flashes or the headphones power off.
- Step 3: Release the button and wait 30 seconds.
- Step 4: Power the headphones back on and attempt charging again.
Note: A reset does not erase paired device history on the SonoFlow, so there is no need to re-pair Bluetooth devices after completing this step unless connectivity issues appear alongside the charging problem.
Fix 5: Let the Battery Rest and Trickle Charge
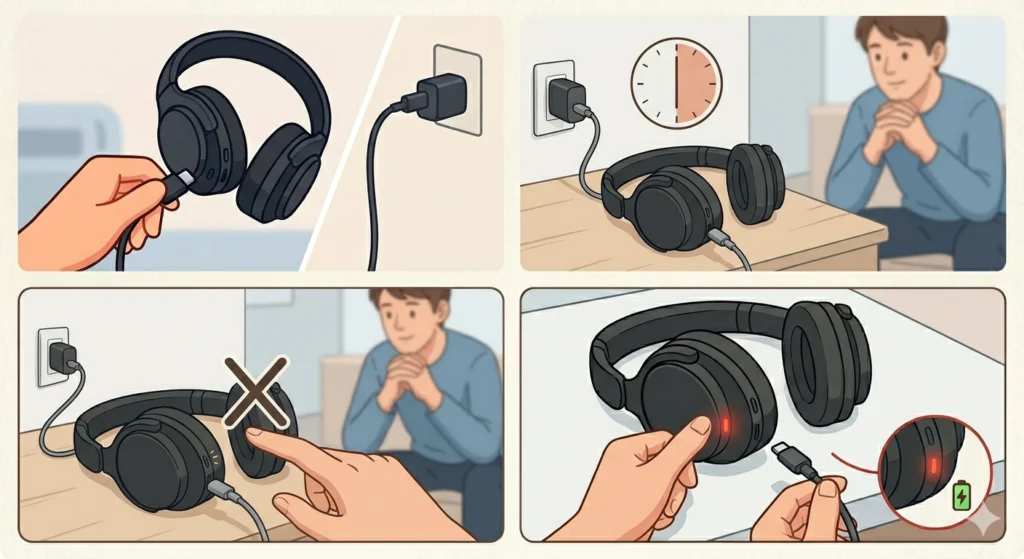
If the SonoFlow battery has been completely drained for a long period – days or even weeks – it may have entered a deep discharge state. In this condition, the battery voltage drops so low that the headphones do not respond to a normal charging attempt at first. The fix here requires a bit of patience.
- Step 1: Plug the SonoFlow into a wall adapter using the original or a certified USB-C cable.
- Step 2: Leave it connected without interruption for at least 30 to 60 minutes.
- Step 3: Do not try to power on the headphones during this waiting period.
- Step 4: After the waiting period, check if the charging LED has come on. If it has, continue charging to full.
The key is consistency here – leaving the headphones connected to a stable power source gives the battery management system time to recover and resume normal charging.
Fix 6: Update the Firmware via 1More Music App
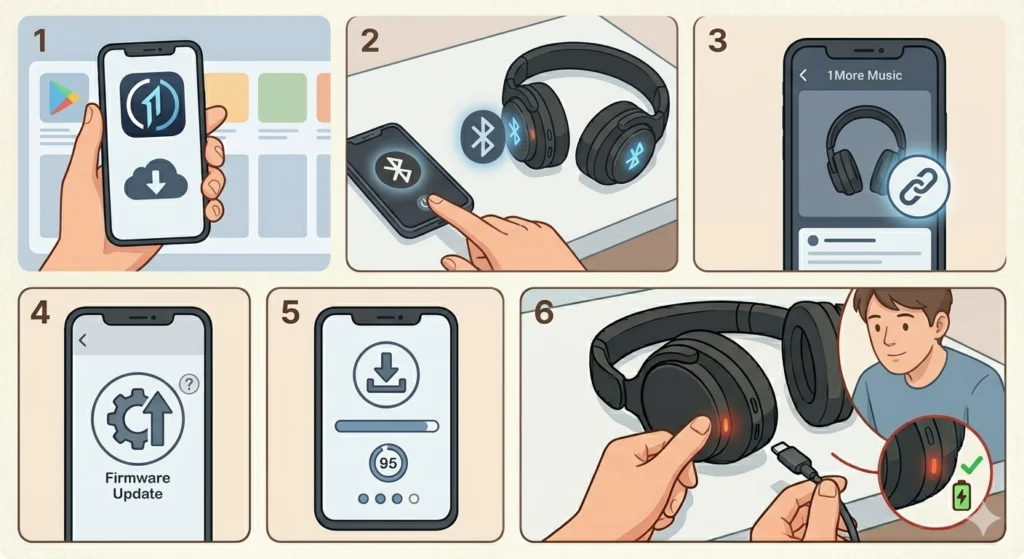
Outdated firmware can introduce bugs that affect charging behavior. 1More releases firmware updates through the 1More Music app, and keeping the SonoFlow updated is a good practice for overall performance.
- Step 1: Download and install the 1More Music app on a smartphone if not already installed.
- Step 2: Enable Bluetooth on the phone and power on the SonoFlow.
- Step 3: Open the 1More Music app and connect to the SonoFlow.
- Step 4: Navigate to the device settings within the app and check for any available firmware updates.
- Step 5: Follow the on-screen instructions to install the update if one is available.
- Step 6: Once the update is complete, attempt charging the headphones again.
Fix 7: Inspect for Physical Damage to the Port or Connector
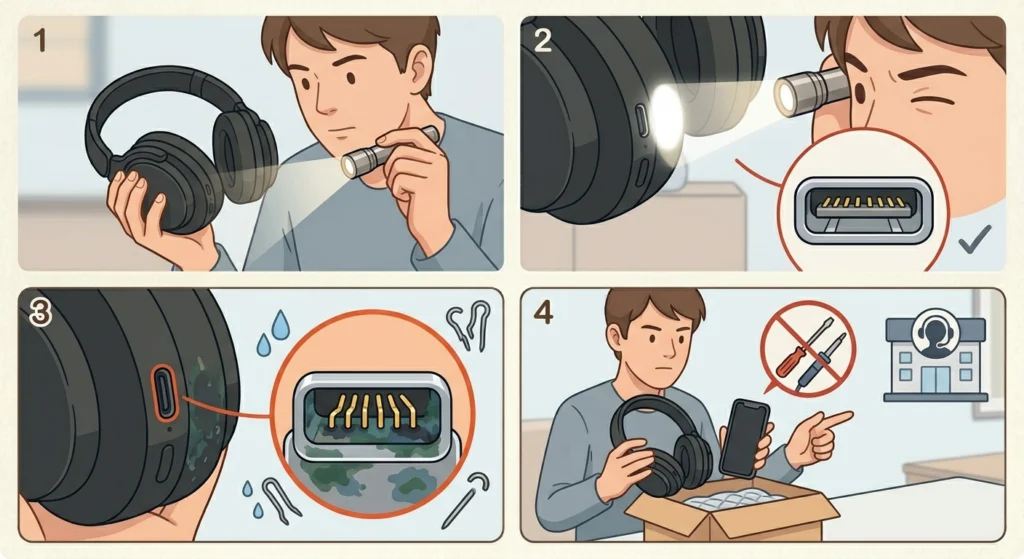
If the charging port has bent pins, corrosion, or visible damage inside, no cable will be able to make the proper contact needed to charge the headphones. This type of damage usually happens from forcing the cable in at an angle or from moisture exposure.
- Step 1: Use a flashlight to look directly into the USB-C port on the headphones.
- Step 2: Check for bent or displaced pins inside the port.
- Step 3: Look for any discoloration or corrosion that might indicate moisture damage.
- Step 4: If physical damage is visible, do not attempt to repair it at home – proceed directly to a service center or contact 1More support.
Pro-Tip: Physical port damage is not always obvious from the outside. If the cable fits but the charging indicator still does not turn on after all other fixes, a damaged port is the most likely culprit and warrants a professional inspection.
Tips to Keep the 1More SonoFlow Charging Properly
- Always use a USB-C cable rated for charging, not data-only cables.
- Avoid leaving the SonoFlow fully discharged for extended periods – try to recharge before the battery drops below 10 percent.
- Store the headphones in a clean, dry environment to prevent debris buildup in the port.
- Use a wall adapter instead of a laptop USB port for faster and more reliable charging sessions.
- Check for firmware updates regularly through the 1More Music app to keep the headphones running optimally.
- Handle the charging cable gently near the connectors to extend its lifespan.
Common Charging Problems with the 1More SonoFlow
Charging LED Does Not Light Up
When the LED shows no sign of life, the most common causes are a faulty cable, an incompatible power source, or a deeply discharged battery. Start with Fix 1 and Fix 2 from the guide above before assuming the headphones are defective.
Charging Stops Before Reaching Full Battery
This can happen when the USB-C connection is intermittent due to port debris or a slightly damaged cable. Cleaning the port and replacing the cable usually resolves this. If the problem persists, a firmware issue may be causing the battery management system to report full charge prematurely.
Headphones Show Charging but Battery Does Not Increase
If the LED indicates charging but the battery level stays the same, the internal battery may be aging or damaged. This is more common in older units. A hard reset (Fix 4) can sometimes resolve a software reporting error, but if the issue continues, a battery replacement through 1More service is the appropriate path.
USB-C Cable Feels Loose in the Port
A loose cable connection is almost always caused by debris packed into the charging port. Cleaning the port thoroughly as described in Fix 3 will restore a snug, reliable connection in most cases.
Headphones Only Charge on Certain Cables or Adapters
This points to an issue with the charging port contacts being slightly dirty or corroded. Some cables with slightly different connector tolerances make better contact than others. Cleaning the port is the recommended fix, followed by using a certified cable.
Frequently Asked Questions
Why is my 1More SonoFlow not charging at all?
The most common reasons include a faulty USB-C cable, an incompatible or underpowered adapter, debris blocking the charging port, or a deeply discharged battery. Start by swapping the cable and trying a different power adapter before moving on to other fixes.
What kind of cable does the 1More SonoFlow use for charging?
The 1More SonoFlow charges via a standard USB-C cable. Make sure to use a cable that supports charging and not a data-only USB-C cable, as data-only cables cannot deliver enough current to charge the headphones.
How long does it take to fully charge the 1More SonoFlow?
The 1More SonoFlow typically takes around 1.5 to 2 hours to charge fully from empty. Charging time can vary slightly depending on the output of the power adapter being used.
Can I use any USB-C charger for the 1More SonoFlow?
Any USB-C charger that outputs at least 5V/1A should work for charging the SonoFlow. Fast chargers with higher voltages are safe to use as the headphones regulate the input, but the original or a certified cable is always the most reliable option.
Will resetting the 1More SonoFlow delete my paired devices?
A standard hard reset via the power button does not erase the paired device list on the SonoFlow. However, a full factory reset through the 1More Music app will clear all paired devices, requiring them to be connected again afterward.
What do the LED colors mean when charging the 1More SonoFlow?
While charging, the LED on the SonoFlow typically glows red or amber. Once fully charged, it turns white or turns off depending on the firmware version. If no LED lights up when the cable is connected, there is likely a charging issue that needs to be addressed.
Can a deeply discharged battery in the SonoFlow be recovered?
Yes, in most cases. Connecting the headphones to a wall adapter and leaving them undisturbed for 30 to 60 minutes allows the battery management system to recover from a deep discharge state and resume normal charging.
How do I clean the charging port on the 1More SonoFlow safely?
Use a dry wooden toothpick or a soft-bristled brush to gently remove debris, followed by a short burst of compressed air. Avoid using metal tools, cotton swabs with loose fibers, or any liquid cleaners near or inside the port.
Is there a warranty for charging issues on the 1More SonoFlow?
1More typically offers a 12-month warranty on the SonoFlow. If the charging issue is caused by a manufacturing defect and none of the troubleshooting steps resolve the problem, contacting 1More customer support with proof of purchase is the recommended next step.
Does the 1More Music app help with charging problems?
The 1More Music app does not directly fix charging issues, but it is the only way to update the firmware on the SonoFlow. A firmware update can resolve software-related charging bugs, so keeping the app installed and the firmware current is a worthwhile step in the troubleshooting process.