Knowing how to change volume settings in Windows 11 is one of those everyday skills that makes a real difference – whether the audio is too loud during a late-night session or too quiet during a video call. Windows 11 offers several quick and reliable volume control options, from a simple taskbar slider and keyboard shortcuts to the Settings app and the built-in Volume Mixer, and this guide walks through each method clearly and directly.
Quick Summary
- Use the taskbar speaker icon for the fastest volume control adjustment
- Press the physical volume keys on a keyboard or laptop for instant control
- Access Settings > System > Sound for precise slider-based volume control
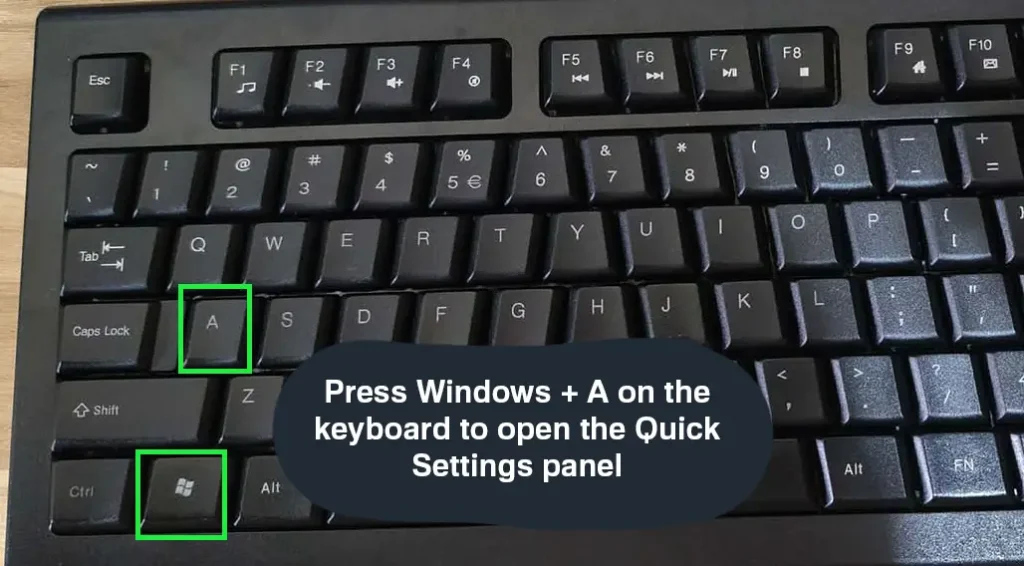
- Use the keyboard shortcut Windows + A to open Quick Settings and adjust volume
- Right-click the speaker icon and open the Volume Mixer for master volume adjustment
How to Change Volume Settings in Windows 11
Method 1: Using the Taskbar Volume Icon
This is the most common and quickest way most people adjust volume on a day-to-day basis. The speaker icon sits right in the system tray at the bottom-right corner of the screen.
- Step 1: Look at the bottom-right corner of the taskbar and click the speaker icon.
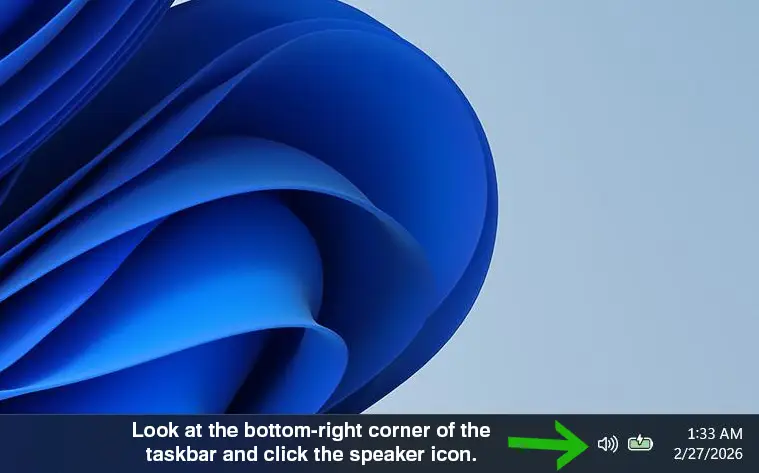
- Step 2: A volume slider will appear above the taskbar.
- Step 3: Click and drag the slider left to decrease volume or right to increase it.

- Step 4: Click anywhere outside the slider panel to close it.
The slider reflects the current master volume level in real time. This works best when a quick adjustment is needed without opening any settings menus.
Method 2: Using Keyboard Volume Keys
Most modern keyboards and laptops include dedicated volume keys – typically labeled with speaker icons or found on the function row. These offer hands-free control without touching the mouse.
- Step 1: Locate the volume up, volume down, and mute keys on the keyboard (usually F1-F12 row or dedicated media keys).
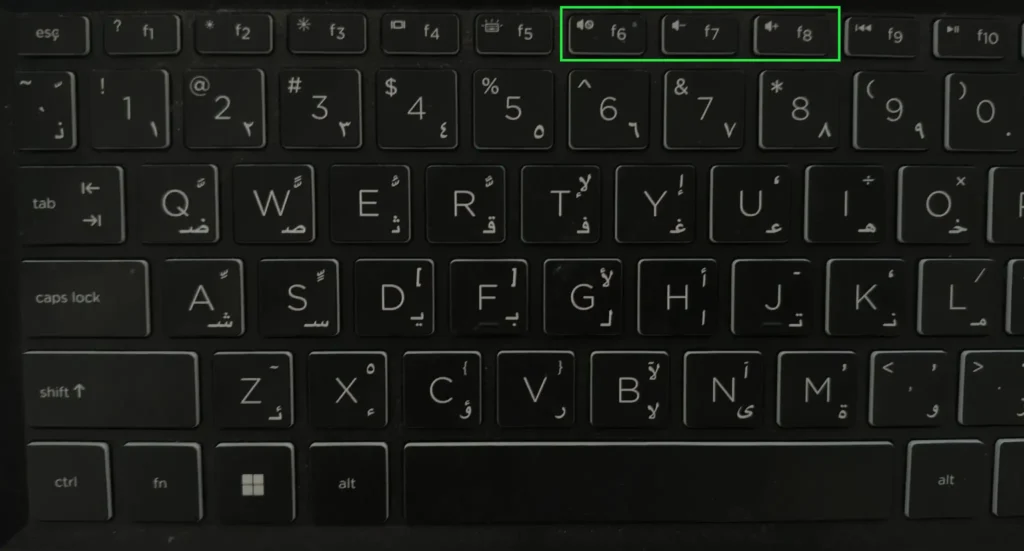
- Step 2: Press the volume up key to raise the system volume incrementally.
- Step 3: Press the volume down key to lower it.
- Step 4: Press the mute key once to mute all audio and again to unmute.
On some laptops, the Fn key may need to be held simultaneously with the function key to activate volume controls.
Pro Tip: When pressing volume keys on Windows 11, a small on-screen overlay appears showing the current volume level. This makes it easy to see exactly where the volume lands without looking at any settings panel.
Method 3: Using Windows Quick Settings (Windows + A)
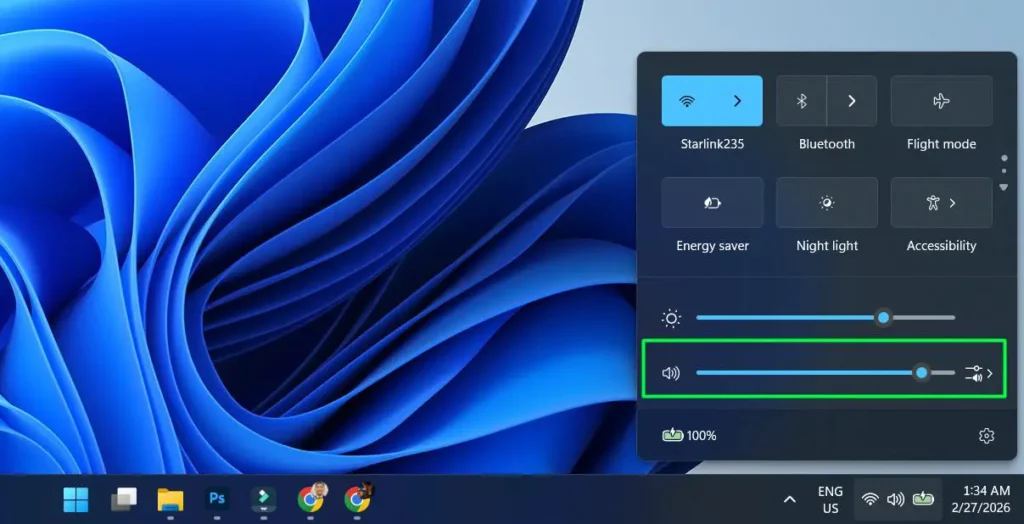
Quick Settings is a handy panel built into Windows 11 that groups common controls in one place – including a dedicated volume control slider.
- Step 1: Press Windows + A on the keyboard to open the Quick Settings panel.
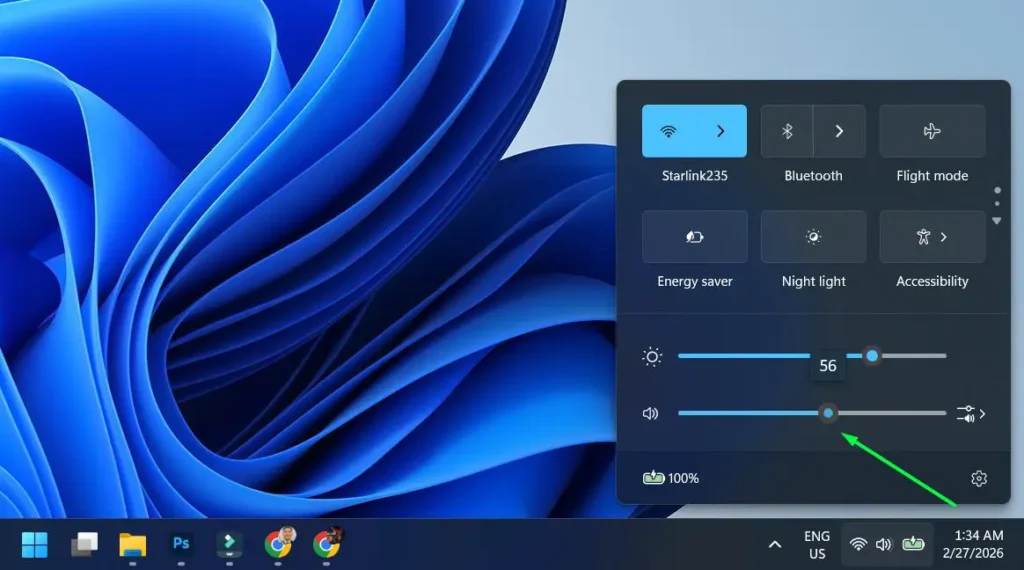
- Step 2: Find the volume slider near the bottom of the panel.

- Step 3: Drag the slider to set the desired volume level.
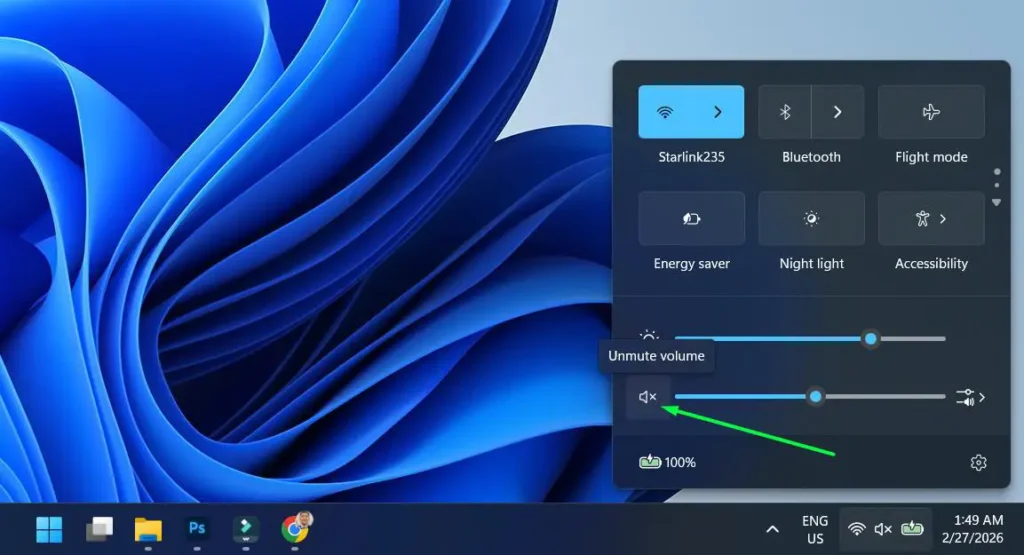
- Step 4: Click the speaker icon next to the slider to toggle mute on or off.
- Step 5: Press Escape or click elsewhere to close the panel.
Method 4: Using the Windows 11 Settings App
For those who prefer a more structured approach, the Settings app provides precise volume control along with access to other sound-related options.
- Step 1: Press Windows + I to open the Settings app.
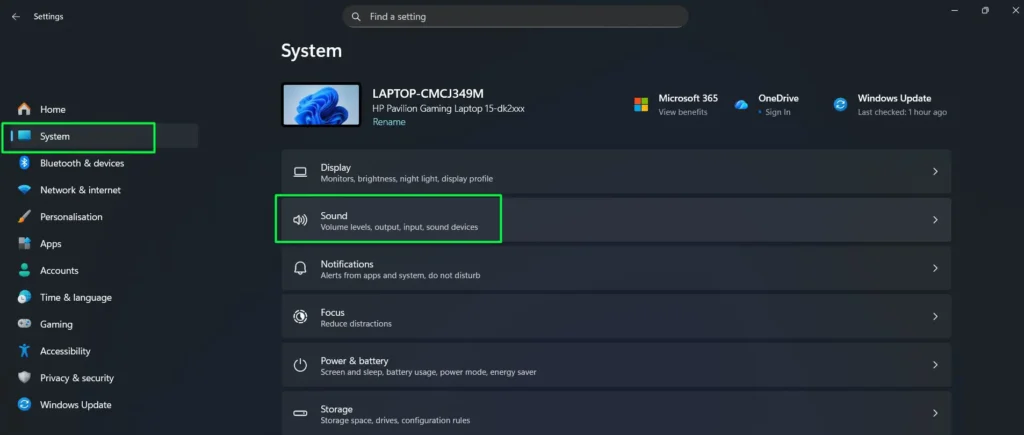
- Step 2: Click on ‘System’ in the left-hand sidebar.
- Step 3: Select ‘Sound’ from the list.
- Step 4: Under the ‘Output’ section, locate the ‘Volume’ slider for the selected output device.
- Step 5: Drag the slider to increase or decrease the master volume.
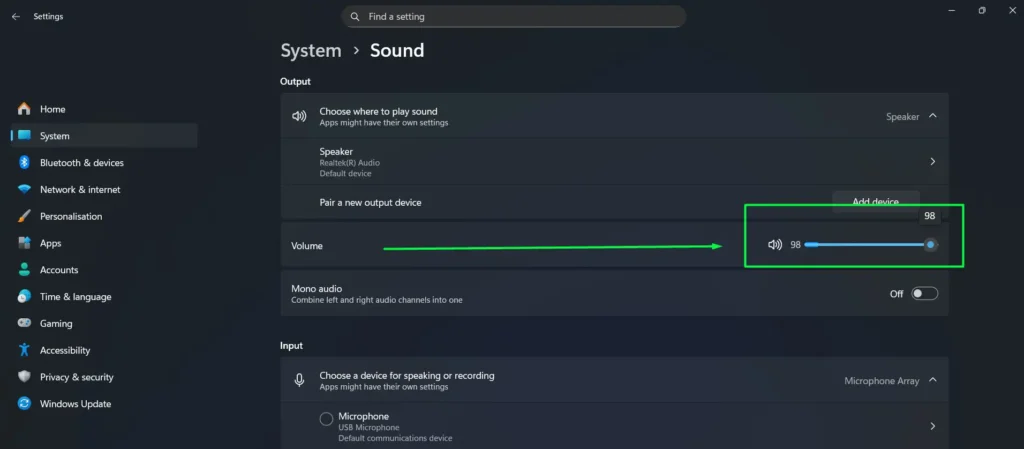
This method is particularly useful when also needing to check which audio output device is currently active and confirm it matches the connected speakers or headphones.
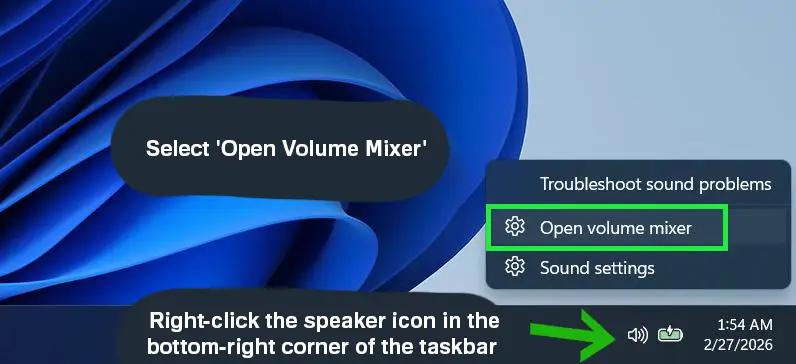
Method 5: Using the Volume Mixer via Right-Click
The Volume Mixer is a built-in Windows 11 tool that opens directly from a right-click on the taskbar speaker icon, offering another reliable path to master volume adjustment.
- Step 1: Right-click the speaker icon in the bottom-right corner of the taskbar.
- Step 2: Select ‘Open Volume Mixer’ to see and control volume levels.
- Step 3: In the Volume Mixer, adjust the master output slider at the top to change the overall system volume.
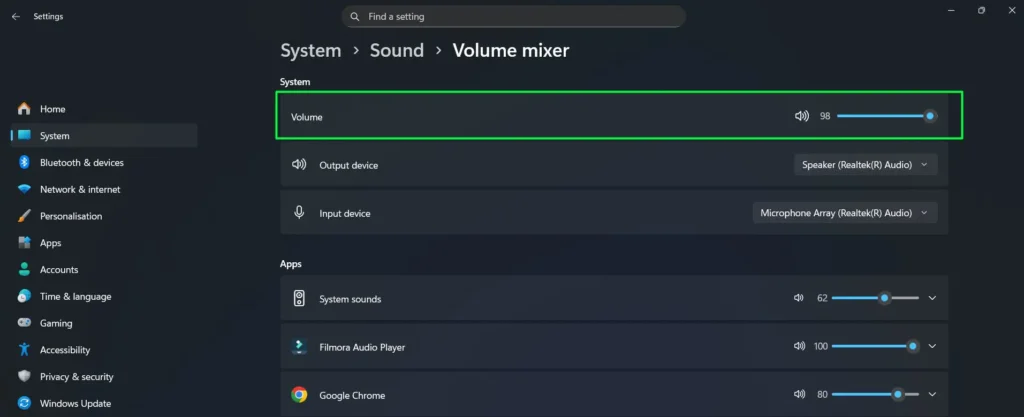
The Volume Mixer also shows individual app volume controls. For anyone who wants to fine-tune audio per application, the full guide on adjusting volume for individual apps on Windows covers that in detail.
Tips for Better Volume Control in Windows 11
- Pin Quick Settings to the taskbar for even faster access to the volume slider.
- If using headphones and speakers interchangeably, check the active output device under System > Sound so the volume adjusts on the correct device.
- The master volume slider affects all apps simultaneously. For more granular control, visit the Volume Mixer or check the per-app volume guide.
- If left and right audio channels feel uneven, look into adjusting the volume balance settings to correct the stereo output.
- Windows remembers separate volume levels for different output devices, so switching from speakers to headphones may result in a different volume level.
Pro Tip: Pressing Windows + A gives the fastest path to the volume slider without using the mouse at all. Just press the shortcut, then use the Tab key and arrow keys to navigate and adjust the slider entirely from the keyboard.
Common Problems with Volume Settings in Windows 11
Volume Slider Is Greyed Out or Unresponsive
This usually means no active output device is detected. Check that speakers or headphones are properly connected and that Windows recognizes them under System > Sound. Switching the selected output device often restores slider functionality.
Volume Changes but No Sound Comes Out
The system might be set to output audio to the wrong device. Go to Settings > System > Sound and check which device is listed under ‘Output.’ Selecting the correct one – such as headphones or external speakers – typically resolves this immediately. For a detailed walkthrough, the guide on adjusting audio output settings is a good next step.
Volume Resets to a Different Level After Restart
This can happen if a third-party audio driver or application is overriding the Windows volume setting on startup. Check startup programs under Task Manager and disable any audio-related apps that may be adjusting volume automatically.
Volume Is Too Low Even at 100%
When the master volume is maxed out but audio still feels too quiet, the issue is often with the app-level volume or the output device’s own volume control. Check the Volume Mixer to see if a specific app is set low. If audio settings have been changed unintentionally, reviewing how to restore defaults through resetting audio settings can bring everything back to normal quickly.
Frequently Asked Questions
How do you quickly change the volume in Windows 11?
The fastest way is to click the speaker icon in the taskbar system tray and drag the slider, or use the physical volume keys on the keyboard. Both methods adjust the master volume instantly without opening any menus.
Where is the volume control in Windows 11 Settings?
Go to Settings > System > Sound. Under the ‘Output’ section, there is a volume slider for the currently selected playback device. Dragging it left or right adjusts the master system volume.
How do you open the Volume Mixer in Windows 11?
Right-click the speaker icon in the taskbar and select ‘Open Volume Mixer.’ This opens a panel showing the master volume slider along with individual sliders for each open application.
What is the keyboard shortcut to open volume settings in Windows 11?
Pressing Windows + A opens the Quick Settings panel, which includes a volume slider. Pressing Windows + I and navigating to System > Sound leads to the full volume settings page.
Why is the volume icon missing from the Windows 11 taskbar?
If the speaker icon is not visible, right-click the taskbar, select ‘Taskbar Settings,’ and under ‘System Tray Icons,’ make sure ‘Volume’ is toggled on. The icon should reappear in the system tray immediately after enabling it.
Can volume settings be changed without using a mouse?
Yes. Physical volume keys on the keyboard work without any mouse interaction. Alternatively, pressing Windows + A and then using the Tab and arrow keys allows full control of the volume slider from the keyboard alone.