Troubleshooting microphone privacy settings in Windows 11 can feel frustrating — especially when everything appears correctly configured but apps still report access denied. This guide goes beyond basic setup and focuses specifically on diagnosing and fixing permission conflicts, registry mismatches, antivirus interference, and administrative restrictions. Each section targets a specific failure point so you can identify and resolve the exact problem fast.
Quick Summary Table
The table below shows the most common microphone privacy problems and where to start diagnosing them.
| Problem | Diagnostic Step | Time Required |
| Apps suddenly can’t access mic | Verify system-wide privacy toggle status | 2 minutes |
| Settings revert after updates | Check Group Policy and registry conflicts | 5 minutes |
| Some apps work, others don’t | Diagnose per-app permission blocks | 3 minutes |
| Privacy options grayed out | Investigate administrator restrictions | 5 minutes |
Understanding Microphone Privacy Conflicts in Windows 11
Troubleshooting microphone privacy settings in Windows 11 requires understanding why permissions fail in the first place. Unlike basic setup procedures, troubleshooting means diagnosing conflicts between system settings, app permissions, and administrative controls. Privacy blocks often appear suddenly after Windows updates, antivirus scans, or other system changes.
The Windows 11 privacy architecture creates multiple potential failure points. Master toggles can disable access system-wide. Individual app permissions can conflict. Registry settings can override what the GUI shows. Group policies can lock settings entirely. Each layer requires separate diagnosis when problems occur.
Most troubleshooting scenarios fall into three categories: permissions that are mysteriously disabled, settings that will not save changes, or apps that claim microphone access while Windows blocks them. Identifying which category applies narrows down the solution quickly.
Diagnosing System-Wide Privacy Blocks
When troubleshooting microphone privacy settings, the first diagnostic check targets the master control. Apps will report microphone access denied errors when this setting is disabled — even when individual app permissions are correctly configured.
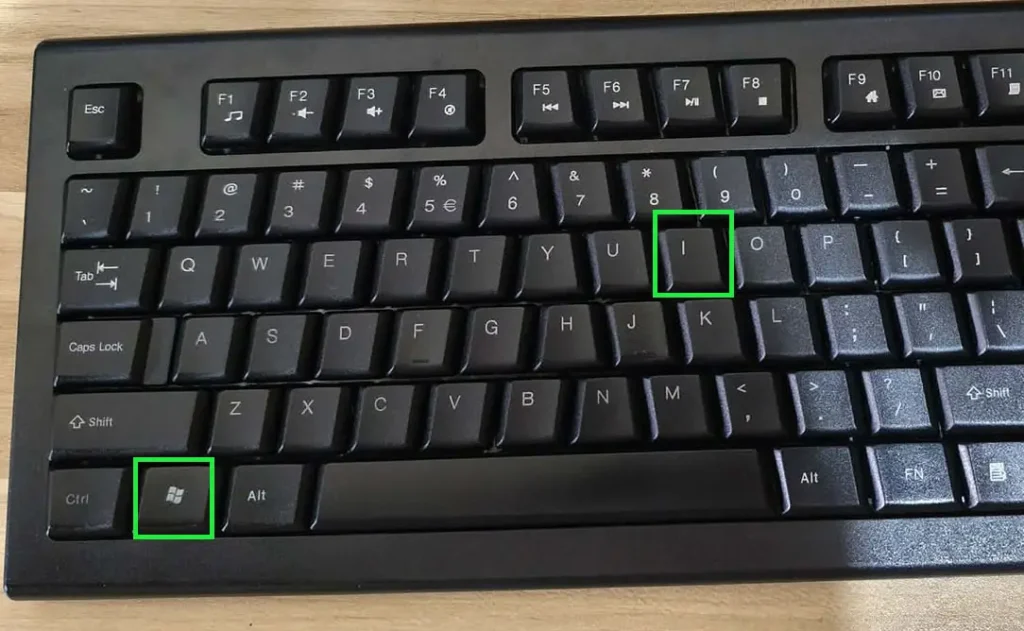
Step 1: Press Windows + I to open Settings.
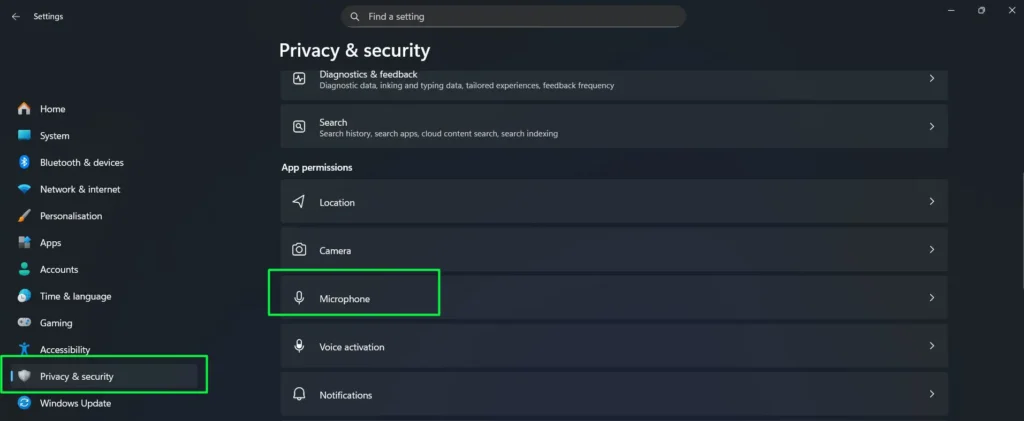
Step 2: Click Privacy & security from the left sidebar.
Step 3: Under the App permissions section, click Microphone.
Step 4: Check the status of the Microphone access toggle at the top of the page.
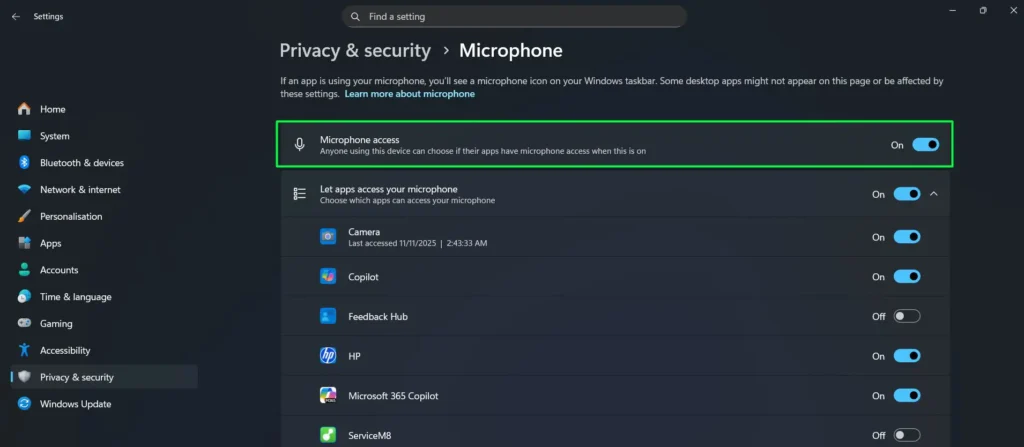
Step 5: Confirm the toggle shows On.
Step 6: If toggling it causes an error message, note the exact wording — this helps identify whether the block is policy-based or registry-based.
Step 7: Close Settings, reopen it, and return to this page to confirm the toggle stayed enabled.
The diagnostic process reveals several common failure patterns. Toggles that immediately revert indicate Group Policy conflicts. Error messages mentioning “administrator” suggest permission problems. Grayed-out controls point to system restrictions or corrupted registry entries.
Pro Tip: If the toggle appears enabled but apps still report denied access, a registry corruption may be causing a mismatch between the GUI display and the actual system state. This requires the advanced registry diagnosis covered further below.
Investigating App-Specific Permission Failures
After confirming system-wide access is enabled, the next step is diagnosing app-level permissions. This identifies whether specific applications lost their access rights individually.
Step 1: Open Settings and go to Privacy & security > Microphone.
Step 2: Scroll down to the “Let apps access your microphone” section.
Step 3: Confirm this toggle is enabled — this is separate from the master system toggle above it.
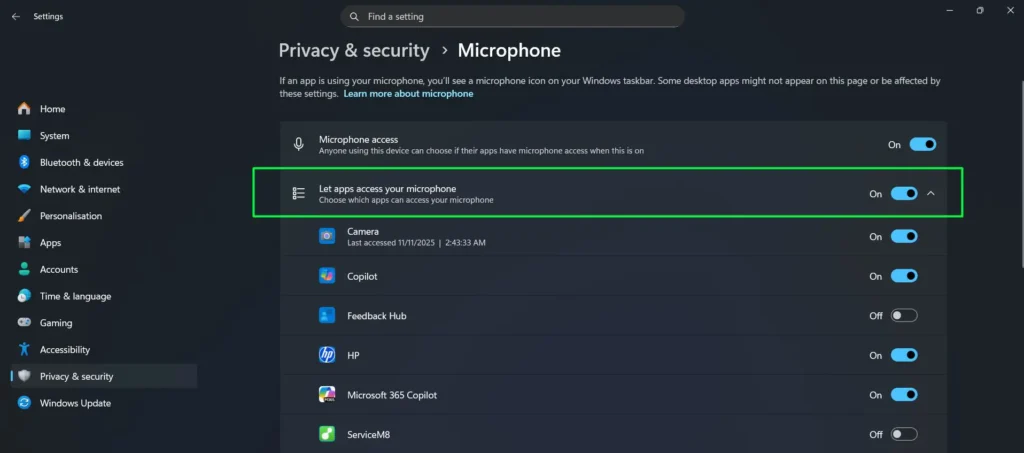
Step 4: Review the Microsoft Store apps list below for the app that is having problems.
Step 5: Check whether the app appears in the list at all.
Step 6: Note whether the app’s individual toggle is off, on, or missing entirely.
Step 7: Launch the app and attempt microphone access to trigger a fresh permission request.
Apps missing from the permission list have either not requested access yet or were installed as desktop applications — which use a different permission system. Apps with disabled toggles had their access revoked, possibly by security software or a Windows update. For guidance on proper permission setup after diagnosis, see this guide on enabling microphone for specific apps.
Communication apps like Zoom, Discord, and Microsoft Teams commonly experience permission failures after major Windows updates. These updates sometimes reset Store app permissions to default states, requiring manual re-verification.
Troubleshooting Desktop Application Access Conflicts
Desktop applications cause unique troubleshooting challenges because Windows 11 does not list them individually in the privacy panel. When desktop programs report microphone errors, the diagnostic approach differs from Store apps.
Step 1: Go to Settings > Privacy & security > Microphone.
Step 2: Scroll down to “Let desktop apps access your microphone.”
Step 3: Check whether this toggle is enabled.
Step 4: Toggle it off, wait 5 seconds, then toggle it back on to reset connections.
Step 5: Confirm no error messages appear during the toggle process.
Step 6: Close any running desktop apps that need microphone access.
Step 7: Relaunch those apps to force a fresh permission check.
Desktop apps include programs like OBS Studio, Adobe Audition, Discord desktop client, and traditional business software. These applications bypass the Store app permission system entirely, relying solely on the desktop apps toggle. When this single control fails, all desktop programs lose access simultaneously.
When one desktop app fails but others work correctly, the problem lies within that specific application rather than Windows privacy settings. Check the app’s internal settings menu for its own microphone device selection and permission controls.
Verifying Microphone Device Settings
Sometimes privacy settings appear correctly enabled but the microphone still does not work. The device itself may be disabled or incorrectly selected in Sound settings.
Step 1: Right-click the speaker icon in the system tray.
Step 2: Select Sound settings from the menu.
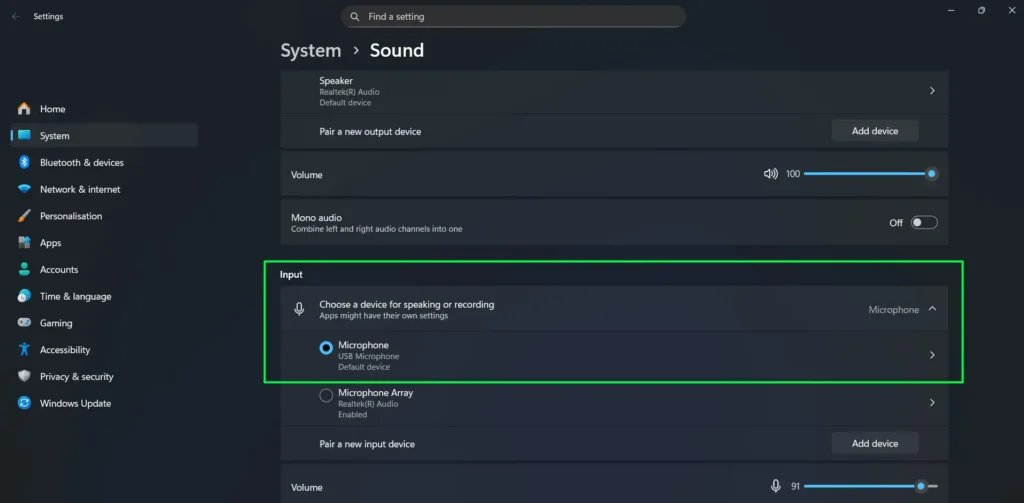
Step 3: Scroll down to the Input section.
Step 4: Click the dropdown under “Choose your input device” to see all available microphones.
Step 5: Select the correct microphone from the list.
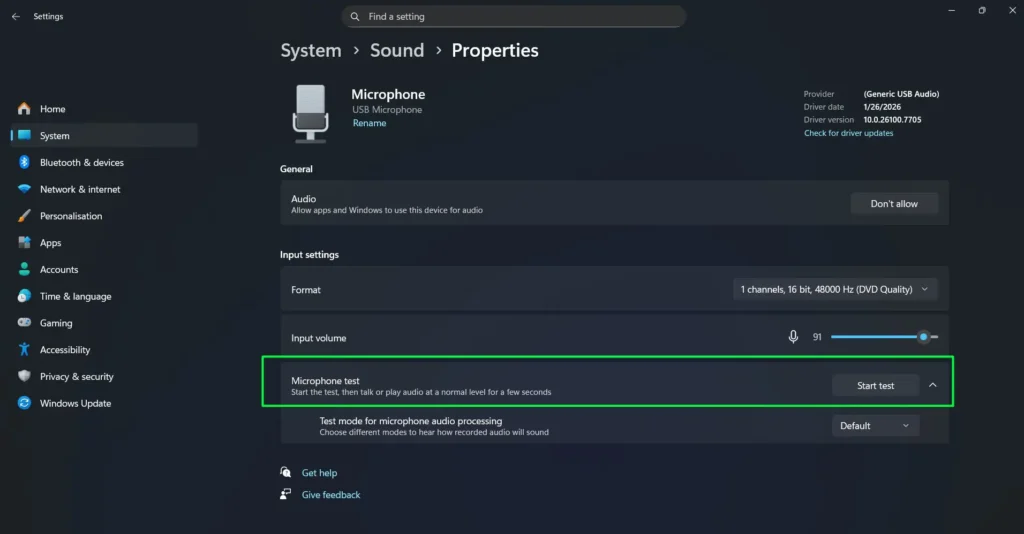
Step 6: Click on the selected microphone device to open its properties.
Step 7: Locate the Microphone test section and click “Start test.”
Step 8: Speak at normal volume for a few seconds.
Step 9: The input volume bar should move in response to your voice if the microphone is working correctly.
Pro Tip: If multiple microphones appear in the device list, the wrong one may be selected by default. USB headsets, built-in laptop mics, and external microphones all appear as separate devices. Test each one while speaking to identify which is actually active.
Resolving Registry-Based Permission Conflicts
Advanced troubleshooting requires checking registry entries when GUI toggles do not reflect actual system permissions. Registry corruption or conflicting values cause settings to appear enabled in the interface while apps still get denied access at the system level.
Step 1: Press Windows + R, type regedit, and press Enter.
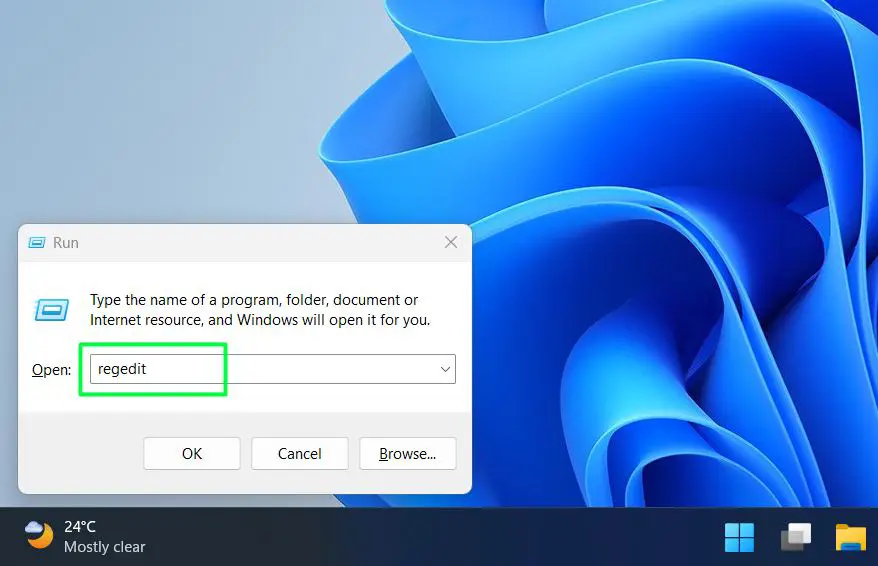
Step 2: Navigate to this path: HKEY_LOCAL_MACHINE\SOFTWARE\Microsoft\Windows\CurrentVersion\CapabilityAccessManager\ConsentStore\microphone
Step 3: Look at the Value entry on the right side of the window.
Step 4: The value must show Allow for microphone access to function correctly.
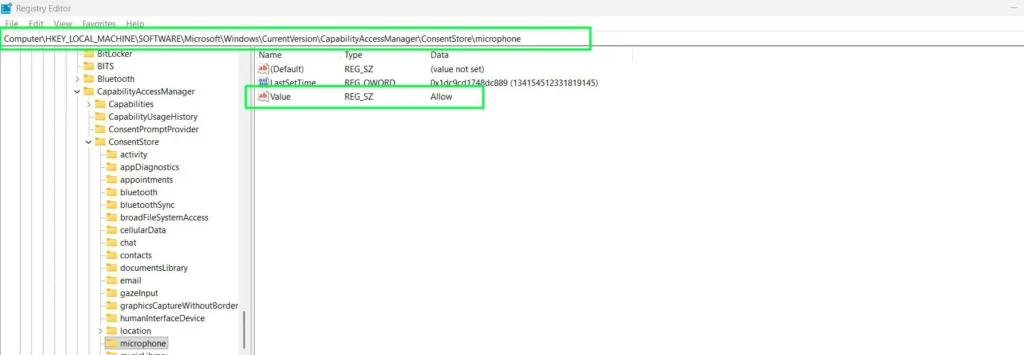
Step 5: If it shows Deny or any other value, this is conflicting with what the GUI shows.
Step 6: Right-click the Value entry and select Modify.
Step 7: Change the value to Allow and click OK.
Step 8: Restart your computer to apply the registry change.
Registry modifications require administrator privileges. On managed computers, IT policies may prevent registry edits. This diagnostic step reveals exactly why Settings toggles can appear functional without actually changing system behavior. After modifying the registry, return to Settings and verify the toggles now match the actual permission state.
Validating Fixes Through Diagnostic Testing
After applying any troubleshooting steps, validation testing confirms whether the fix fully resolved the privacy block. Systematic testing distinguishes a partial fix from a complete solution.
Step 1: Open Settings and go to System > Sound.
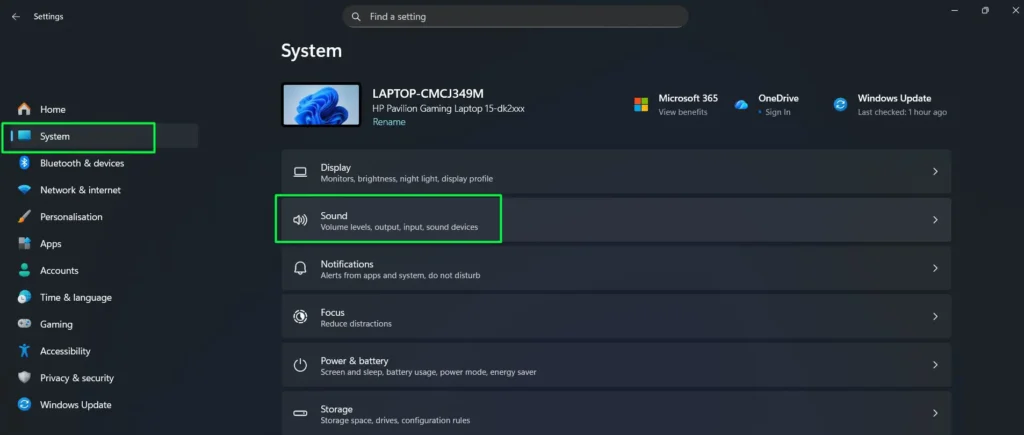
Step 2: Under Input, select your microphone from the dropdown.
Step 3: Click on the selected microphone to open its properties.
Step 4: Locate the Microphone test section.
Step 5: Click the “Start test” button.
Step 6: Speak at normal volume for 10 to 15 seconds.
Step 7: Watch the input volume bar for consistent movement in response to your voice.
Step 8: Test the microphone inside the actual app that was reporting the error — not just in Windows settings.
Step 9: Check whether the microphone icon appears in the system tray while the app is using it.
A successful test shows the input volume bar responding consistently to speech. Weak or inconsistent response suggests remaining issues with device drivers or hardware. No response at all means the microphone still has an underlying problem despite settings appearing fixed. Real-world testing inside the actual problematic app is the definitive confirmation — Windows built-in testing can pass while specific apps still fail due to app-level permission caching. For hardware-related detection issues beyond privacy settings, see this guide on resolving microphone detection problems.
Troubleshooting Best Practices and Prevention Tips
Following these practices prevents future microphone privacy conflicts and makes troubleshooting faster when problems do recur.
- Document current working permissions before Windows updates so you can quickly identify what changed.
- Create a system restore point before modifying any registry settings.
- Export your working registry microphone settings as a backup file for fast restoration if needed.
- Monitor the system tray microphone indicator to catch unauthorized access attempts or conflicting processes.
- Keep a troubleshooting log noting which apps stopped working and when, to help identify patterns.
- Check Windows Update history to correlate permission failures with specific patches.
- Temporarily disable automatic app updates when diagnosing app-specific failures.
- Test your microphone immediately after installing any security software that modifies privacy settings.
- Screenshot your working privacy settings as a reference for future troubleshooting sessions.
- Add audio device drivers to your antivirus exclusion list to prevent interference with microphone access.
The system tray microphone indicator reveals which app is currently using the mic. When troubleshooting unexplained permission blocks, this indicator can expose hidden conflicts — such as multiple apps competing for exclusive access or a background process holding the device open.
Pro Tip: Windows updates particularly affect privacy settings on the second Tuesday of each month (Patch Tuesday). Scheduling a quick permission check on these dates catches reset toggles before they disrupt an important meeting or recording. The check takes about 30 seconds but can prevent hours of troubleshooting later.
Common Problems and Advanced Troubleshooting
Even with correct privacy settings, some scenarios require a deeper diagnostic approach. The sections below cover the most common advanced failures.
Microphone Works in Some Apps But Not Others
This usually indicates app-specific permission caching. Check both Windows privacy settings and the application’s own internal audio settings menu. Many programs maintain their own permission databases separate from Windows controls — Discord, Zoom, and Teams all cache permissions independently.
Clear the problematic app’s cache through Settings > Apps > Installed apps > Advanced options > Reset. For desktop applications, uninstall and reinstall to flush permission caches. Some apps store permissions in AppData folders that survive a standard uninstall.
Settings Keep Reverting After Reboot
Persistent reversion after rebooting indicates registry permission problems or security software interference. Check Event Viewer (Windows + X > Event Viewer > Windows Logs > System) for error messages during startup that mention microphone or privacy components.
Third-party privacy tools like O&O ShutUp10 or privacy-focused antivirus suites can override Windows settings on every boot. Temporarily disable these tools, re-enable your microphone permissions, then add Windows privacy components to the security software’s exclusion list before re-enabling it.
Privacy Toggles Are Grayed Out and Unchangeable
Grayed-out controls always indicate administrative restrictions. Two common causes are registry permission issues on the CapabilityAccessManager key, or user account control limitations.
To check registry permissions, navigate to HKEY_LOCAL_MACHINE\SOFTWARE\Microsoft\Windows\CurrentVersion\CapabilityAccessManager in Registry Editor. Right-click the microphone key, select Permissions, and verify the current user account has Full Control. On work computers, MDM systems enforce policies remotely — contact IT support for any MDM permission adjustments.
Microphone Access Shows “No Apps Have Requested Access”
This message means no Microsoft Store apps have triggered permission requests yet. Desktop applications do not appear in this list by design. The absence does not indicate a problem — it simply means no Store apps have requested microphone access yet.
Launch Store apps and attempt to use their microphone features to populate the list. The Windows Camera app is a quick option — opening it triggers a microphone permission request that adds it to the list immediately.
Antivirus Blocks Microphone Despite Windows Permissions
Security suites like Kaspersky, Bitdefender, and Norton include webcam and microphone protection modules that operate independently of Windows privacy controls. These modules maintain their own allow and block lists that take precedence over Windows settings.
Open your antivirus dashboard and locate webcam or privacy protection settings. Add the problematic application to the allowed list. Some security software requires a restart after permission changes before the new rules take effect.
Virtual Machines or Remote Desktop Sessions Fail
Virtualization adds complexity because privacy settings exist in both the host OS and the guest OS. RDP sessions require specific configuration to allow audio device redirection. Verify both Windows settings and policies to confirm audio redirection is enabled at both levels.
For VMware or VirtualBox, ensure the guest OS has microphone passthrough enabled in the virtual machine settings. The host computer’s privacy settings also apply — both layers need correct configuration simultaneously.
Browser-Based Apps Fail Despite System Permissions
Browsers add an independent permission layer on top of Windows privacy settings. Chrome, Edge, and Firefox each maintain their own microphone permissions per website. Check your browser settings under Site settings > Microphone to verify the specific website has been granted permission.
Browsers also cache permission decisions. When troubleshooting, clear site data for the problematic website, reload the page, and grant microphone permission again when prompted. Note that some websites require an HTTPS connection for microphone access — HTTP sites are automatically blocked by modern browsers regardless of Windows settings.
Frequently Asked Questions
Why do my microphone privacy settings reset after Windows updates?
Windows updates — especially feature updates — sometimes revert privacy settings to default values by treating them as user preferences rather than system configurations. Create a restore point before major updates and verify microphone permissions immediately afterward. Documenting your current settings before updates allows you to restore them quickly if a reset occurs.
How do I fix microphone permissions that won’t stay enabled?
Permissions that immediately revert usually indicate third-party software interference or corrupted registry entries. Temporarily disable your antivirus privacy protection modules to test for conflicts. If the problem persists, check the registry at HKEY_LOCAL_MACHINE\SOFTWARE\Microsoft\Windows\CurrentVersion\CapabilityAccessManager\ConsentStore\microphone and verify the Value entry shows Allow.
What causes microphone privacy toggles to be grayed out?
Grayed-out toggles indicate administrative restrictions preventing changes. Common causes include MDM policies on corporate devices, registry permission restrictions on the CapabilityAccessManager key, or limited user account privileges. If Settings displays “Some settings are managed by your organization,” this confirms policy enforcement that requires administrator intervention to resolve.
Why does my microphone work in Windows but not in specific apps?
This typically points to app-level permission caching, internal app settings conflicts, or exclusive device access issues. Windows privacy settings may show correctly configured, but the app maintains its own cached permission state. Reset the app through Settings > Apps > Advanced options > Reset, check the app’s internal audio device selection, and verify no other program has exclusive control of the microphone in Sound settings advanced properties.
How do I diagnose which setting is blocking my microphone?
Use systematic elimination. First verify the system-wide Microphone access toggle is on. Second check the Store apps or desktop apps toggle depending on the application type. Third test in Windows Sound settings to confirm the device works at the hardware level. Fourth check the registry for conflicts. Fifth examine antivirus privacy modules. This hierarchy isolates whether the block occurs at the system, app, registry, or security software level.
Can antivirus software override Windows microphone permissions?
Yes. Security suites often include microphone and webcam protection modules that operate independently of Windows privacy controls, maintaining their own allow and deny lists that take precedence over Windows settings. Check the antivirus dashboard for privacy or webcam protection features and add the affected application to the trusted list.
Why don’t desktop apps appear in the microphone permissions list?
Desktop applications use a different permission architecture than Microsoft Store apps. Windows 11 does not provide per-app toggles for desktop programs — they all share a single “Let desktop apps access your microphone” control. This means troubleshooting desktop app failures requires checking that master toggle rather than looking for individual app entries. Store apps get granular per-app controls; desktop apps get all-or-nothing access.
What does “Some settings are managed by your organization” mean for troubleshooting?
This message confirms that MDM policies are enforcing microphone settings remotely, which is why toggles appear grayed out or revert after changes. On work computers, IT administrators control these policies through management servers and must be contacted to make adjustments. On personal computers showing this message, third-party security software is likely enforcing restrictions — investigate your privacy or antivirus tools first.