
Water-damaged earbuds are frustrating – but in many cases, they can be saved if the right steps are taken quickly. Whether the earbuds fell into a sink, got soaked in rain, or ended up in a washing machine, the recovery process is mostly the same. The key is acting fast and avoiding a few common mistakes that make the damage permanent.
Quick Summary: What to Know Before Starting
- Do not turn on or charge the earbuds immediately after water exposure
- Do not use a hair dryer or oven to dry them – heat warps internal components
- Shake out excess water right away, then let them dry for at least 24-48 hours
- Silica gel packets or uncooked rice help absorb moisture during drying
- Most earbuds can recover from light to moderate water exposure with proper drying
- Saltwater and soapy water are more damaging than plain water and need faster action
Step-by-Step Guide to Fix Water-Damaged Earbuds
Fix 1: Remove Them from Water and Power Off Immediately
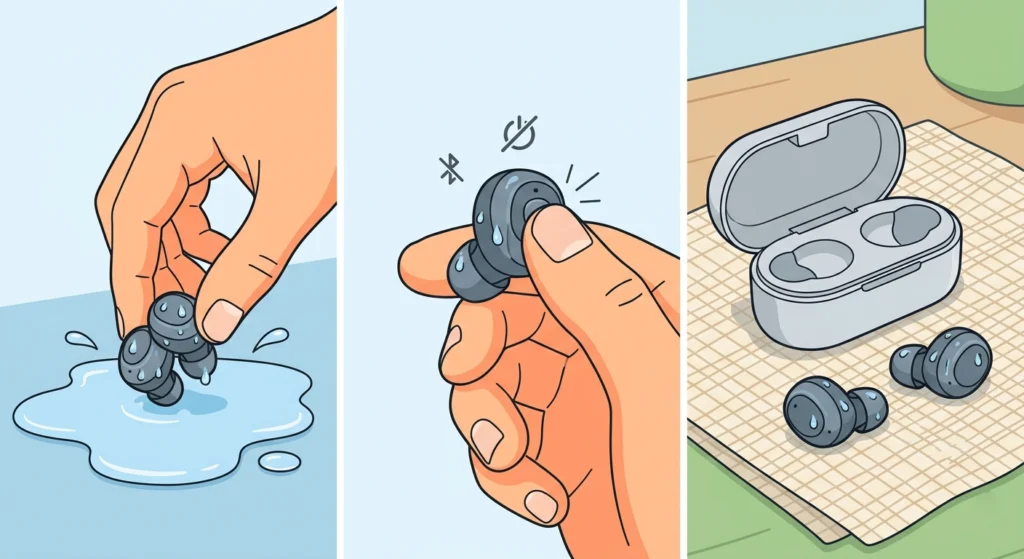
- Step 1: Take the earbuds out of the water as fast as possible. Every second of continued exposure increases the damage.
- Step 2: If the earbuds are powered on, turn them off right away. Do not test the sound. Do not connect them via Bluetooth. Power running through wet circuits causes short circuits.
- Step 3: If there is a charging case, take the earbuds out and leave the case open. Do not place wet earbuds back into a case that may also be wet.
Fix 2: Shake Out and Wipe Away Excess Water
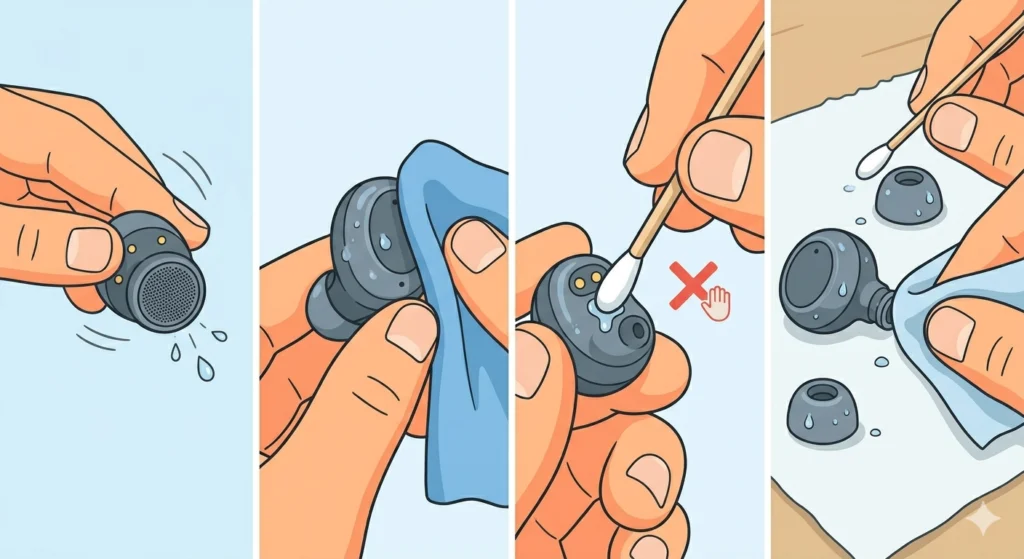
- Step 1: Hold each earbud with the speaker or mesh side facing down. Give them a firm but controlled shake to push out trapped water from the speaker grille.
- Step 2: Use a soft, dry microfiber cloth or paper towel to gently blot the outer surfaces. Avoid rubbing, which can push moisture deeper into the mesh or seams.
- Step 3: Use a dry cotton swab to carefully soak up any water sitting in the charging ports, microphone holes, or crevices. Do not insert it too deeply.
- Step 4: If the earbuds came with silicone ear tips, remove them. Water often collects underneath. Wipe both the tips and the nozzle area thoroughly.
Pro-Tip: For earbuds with a mesh speaker cover, lightly pressing a dry cloth against the mesh and then pulling it away (like a dabbing motion) pulls out moisture more effectively than wiping side to side.
Fix 3: Dry the Earbuds Properly
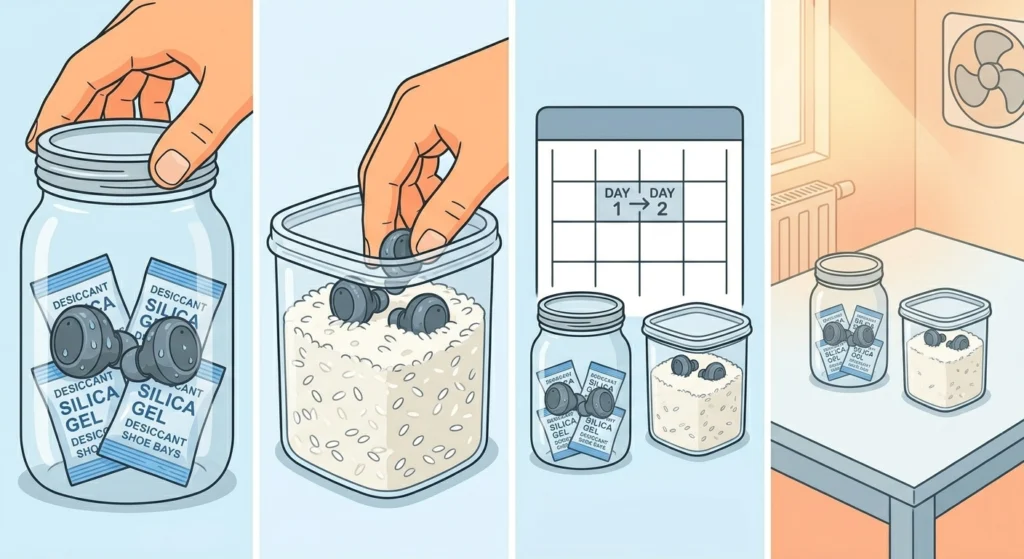
- Step 1: Place the earbuds in a container or zip-lock bag filled with silica gel packets. These are the small desiccant packets found in shoe boxes, electronics packaging, and vitamin bottles. Silica gel absorbs moisture far better than rice.
- Step 2: If silica gel is not available, uncooked white rice works as a backup option. Bury the earbuds completely and seal the bag or container.
- Step 3: Leave them in the drying material for a minimum of 24 hours. For heavy exposure – like a full wash cycle – wait 48 to 72 hours before testing.
- Step 4: Place the container in a warm, dry room. Avoid placing it in direct sunlight or near a heat source. Room temperature airflow is ideal.
Most people find that skipping the waiting period is the most common reason earbuds fail to recover. The internal components need full drying time before any power is applied. Patience here makes a real difference.
Fix 4: Clean the Charging Contacts and Ports
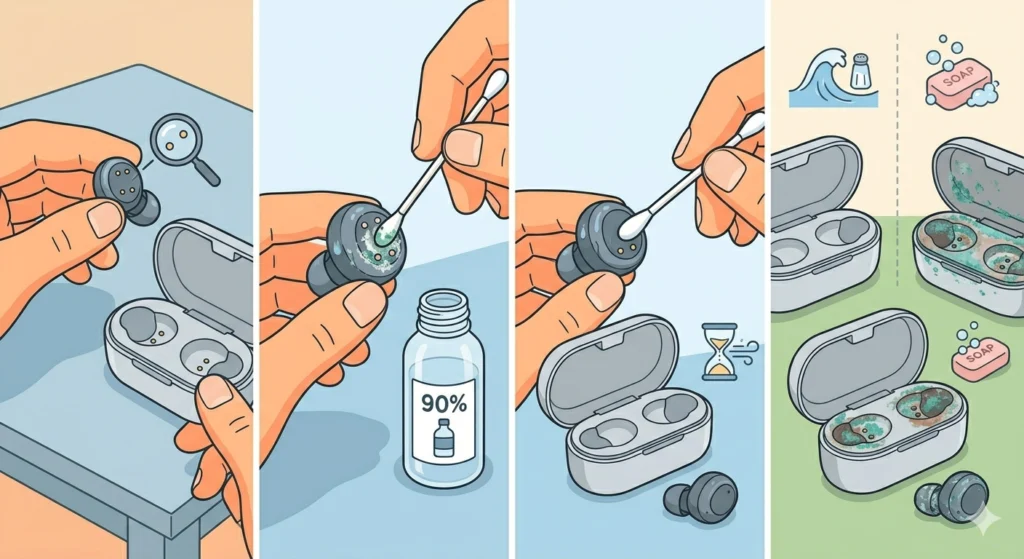
- Step 1: Once the earbuds look and feel dry on the outside, inspect the charging contacts. These are the small metal pins on the earbuds and inside the case.
- Step 2: If there is any visible corrosion (white or green residue), lightly dip a cotton swab in 90% isopropyl alcohol and gently scrub the contacts. Isopropyl alcohol evaporates quickly and is safe for electronics.
- Step 3: Use a dry swab to wipe away any remaining alcohol or residue. Allow the contacts to air dry for another 15-30 minutes before doing anything else.
- Step 4: If the earbuds were exposed to saltwater, ocean water, or soapy water, this cleaning step is especially critical. These liquids leave behind residue that continues to corrode contacts even after the water itself has dried.
Pro-Tip: Use 90% isopropyl alcohol or higher – lower concentrations contain more water and can extend the drying time needed. Standard 70% rubbing alcohol from a pharmacy introduces more moisture than it removes.
Fix 5: Test the Earbuds Before Charging
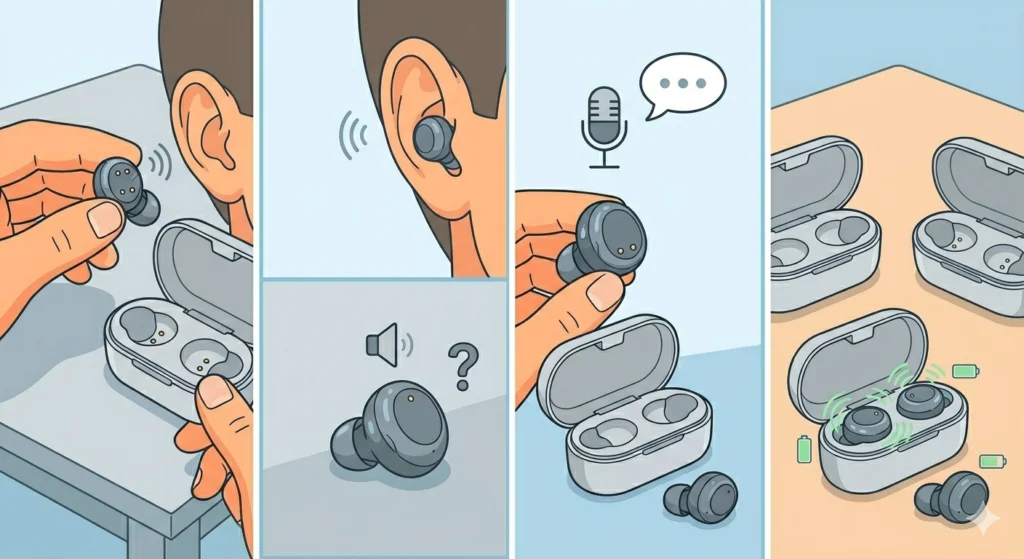
- Step 1: After the full drying period, power on the earbuds and test audio on one earbud at a time.
- Step 2: Play audio at low volume first. Listen for muffled sound, crackling, or one-sided audio loss. Some earbuds have temporary audio issues that clear up after another few hours of air drying.
- Step 3: If the audio sounds normal, test the microphone by making a short call or voice recording.
- Step 4: If everything functions correctly, place the earbuds on charge and confirm that charging begins as expected.
This works best when the earbuds are tested with a Bluetooth-connected device first before attempting any charge. If the audio cuts in and out during testing, it may point to a Bluetooth pairing or stereo sound issue rather than ongoing water damage – which is worth checking separately.
Tips for Better Recovery Results
- Act within the first 30 minutes after water exposure for the best recovery chances
- Avoid storing the earbuds in a closed case while they are still damp – trapped moisture with no airflow slows drying significantly
- Keep a few silica gel packets stored with the charging case as a habit – they can be reused for situations like this
- For earbuds with an IPX4 or higher water resistance rating, recovery is more likely even from moderate soaking, but the drying process should still be followed
- Never charge the earbuds if the charging port still looks wet or feels damp to the touch
- If the earbuds were in a washing machine, run through the full 48-72 hour drying process even if they seem fine on the outside
Common Problems After Water Damage
One Earbud Has No Sound
This is one of the most common results of water exposure. The speaker in one unit may have been affected more than the other. Leave the silent earbud in silica gel for an additional 24 hours. If sound does not return, the speaker driver may have suffered physical damage from water pressure or short circuit during the incident. In some cases, a full reset of the earbuds restores proper audio routing between the two units.
Muffled or Distorted Audio
Muffled sound after water damage usually means moisture is still sitting against the speaker mesh or diaphragm. This often clears up on its own with continued drying. Pointing the speaker mesh downward and leaving the earbuds in a warm, dry spot for another 12-24 hours resolves this in many cases.
Earbuds Will Not Charge
Charging failures after water exposure are typically caused by corroded charging contacts or a damaged charging circuit. Clean the contacts with 90% isopropyl alcohol as described in the steps above. If the contacts look undamaged and clean, the internal charging circuit may have been shorted. This type of damage usually requires professional repair or replacement.
Microphone Not Detected or Working Poorly
Microphone issues after water damage are common. The mic port is a small opening that collects and holds moisture. Dry the earbuds further and clean around the mic port opening gently with a dry cotton swab. If using the earbuds with a Windows device and the mic still is not recognized, it may help to check the microphone detection settings in Windows 11 to rule out a software-side issue.
Earbuds Turn On But Keep Disconnecting
Intermittent disconnections after water damage can point to damaged antenna components or sensor issues inside the earbuds. Start with a full reset (hold the multifunction button for 10-15 seconds, depending on the model). If disconnections continue, the internal hardware may have been compromised beyond what drying alone can fix.
Frequently Asked Questions
Can water-damaged earbuds be fixed at home?
Yes, in many cases. Light to moderate water exposure can be recovered from at home using the drying methods described above. The key factors are how long the earbuds stayed in water, what type of water it was (plain, salt, or soapy), and whether power was applied while wet. Acting quickly and drying properly gives the best chance of a full recovery.
How long should water-damaged earbuds be left to dry?
A minimum of 24 hours is recommended for light exposure. For heavier soaking – such as a washing machine cycle or submersion in deep water – allow 48 to 72 hours in silica gel before powering on. Testing too early is the most common reason earbuds fail to recover.
Is rice effective for drying water-damaged earbuds?
Rice works as a backup option when silica gel is not available. It does absorb some moisture, but silica gel packets are significantly more effective. If using rice, make sure the earbuds are completely buried and sealed in a bag or container. Leave them for at least 48 hours.
What type of water causes the most damage to earbuds?
Saltwater and soapy water are the most damaging. Both leave residue behind that continues to corrode metal contacts and circuitry even after the liquid itself dries. Plain freshwater is the least harmful and gives the highest recovery rate. If the earbuds were exposed to saltwater or soap, the charging contact cleaning step with isopropyl alcohol is especially important.
Can the earbuds be dried with a hair dryer?
No. Heat from a hair dryer can warp plastic housing, damage adhesives, and deform the speaker diaphragm. Even low heat settings introduce risk. Room-temperature air drying with silica gel is safer and more effective. If airflow is needed, a small fan blowing at room temperature is acceptable.
What does it mean if one earbud works fine but the other does not after water damage?
This typically means the non-working earbud experienced more direct water exposure or its internal components were affected differently. Give the non-working unit additional drying time in silica gel. If audio still does not return after 72 hours of drying, the speaker driver or internal circuit on that unit may be permanently damaged.
Should the charging case also be dried after water damage?
Yes. If the charging case was also exposed to water, dry it separately using the same process – wipe it down, clean the charging contacts with isopropyl alcohol if needed, and place it in silica gel. Do not put the earbuds back inside a wet case, as this keeps both components in a humid environment and slows recovery.
How do you know if the earbuds are fully dry before charging?
Visually inspect the charging contacts, ports, and mesh areas. There should be no visible moisture, and the surfaces should not feel cool or damp to the touch. If the drying container still shows condensation on the inside walls, the process is not complete. When in doubt, give it another 12 hours before charging.
Can water-damaged earbuds cause a safety hazard when charging?
Charging wet or incompletely dried earbuds can cause a short circuit, which may damage the battery or charging circuitry. In rare cases, a short circuit in a lithium battery can cause heat buildup. Always ensure the earbuds are completely dry – both internally and at the charging contacts – before connecting them to power.
Do water-resistant earbuds need the same drying process?
Yes. Water-resistant ratings like IPX4 or IPX5 mean the earbuds can handle splashes and light rain, but they are not waterproof. Extended submersion or exposure to significant water can still allow moisture to enter. Water-resistant earbuds have a higher recovery rate, but the same drying steps should be followed to ensure full recovery.