Quick Summary
- Open Quick Settings by clicking the system tray area (Wi-Fi, sound, battery icons) in the bottom-right corner of the taskbar
- Use the gear icon inside the Quick Settings panel to access notification settings directly
- Toggle app notifications on or off, adjust priority levels, and control banner and sound alerts
- Skip the full Settings app – Quick Settings gives a faster path to notification controls
What Quick Settings Has to Do With Notifications
Windows 11 redesigned the taskbar experience, and one of the most useful changes involves how the Quick Settings panel connects to system-level controls. That small cluster of icons in the bottom-right corner – the ones showing Wi-Fi, volume, and battery status – is the Quick Settings panel. Clicking it opens a compact control hub right above the taskbar.
Inside that panel, a direct shortcut leads straight into the full notification settings. This works best when someone wants to make a quick change without navigating through multiple Settings menus. The key is knowing where that shortcut lives and how to use it effectively.
Windows 11 lets users customize notifications per app, by sound, by banner style, and by priority level. As a result, managing them through Quick Settings becomes the fastest route to those controls – far quicker than digging through the full Settings app manually.
How to Open Quick Settings in Windows 11
Step 1: Look at the bottom-right corner of the taskbar. A group of icons shows the Wi-Fi signal, speaker volume, and battery indicator.
Step 2: Click anywhere on that cluster of icons. The Quick Settings panel appears as a floating popup above the taskbar.
Step 3: At the bottom of the Quick Settings panel, a gear icon sits ready. Click it to open the main Windows Settings app directly.
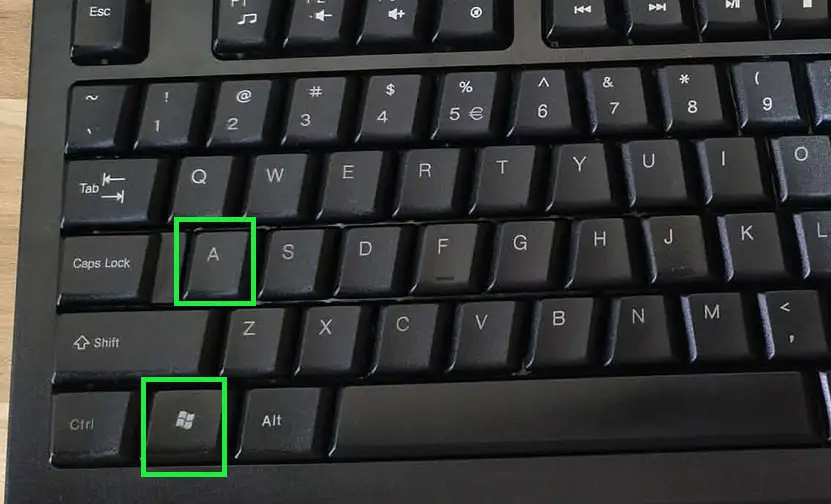
Alternatively, pressing Windows key + A on the keyboard opens Quick Settings instantly from anywhere on the desktop. Either approach works well.
How to Customize Notifications Using Quick Settings in Windows 11
Once the Quick Settings panel is open, follow these steps to reach and adjust notification settings.
Step 1: Click the gear icon at the bottom of the Quick Settings panel. Windows 11 Settings opens immediately.
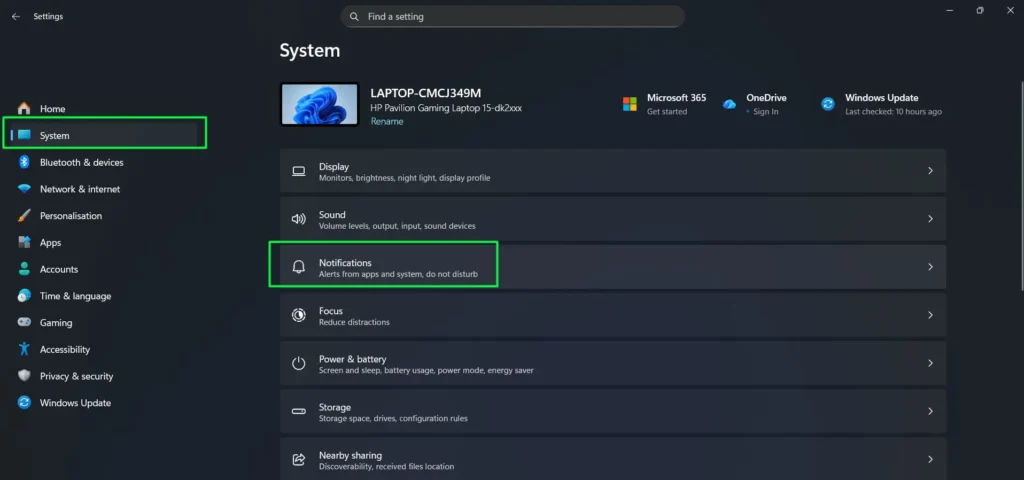
Step 2: Next, click on System in the left sidebar of the Settings app.
Step 3: Then click Notifications from the System menu. This section serves as the main notification control center.
Step 4: At the top of the page, a master toggle labeled Notifications controls all alerts system-wide. Turn it off to silence everything, or keep it on to manage apps individually.
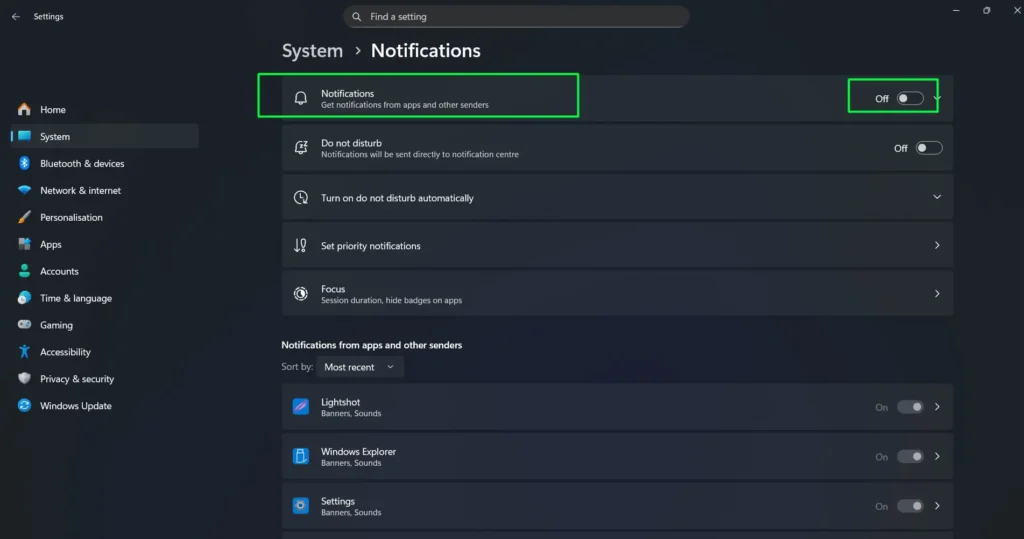
Step 5: Scroll down to find the full list of installed apps. Each app carries its own toggle switch for quick on/off control.
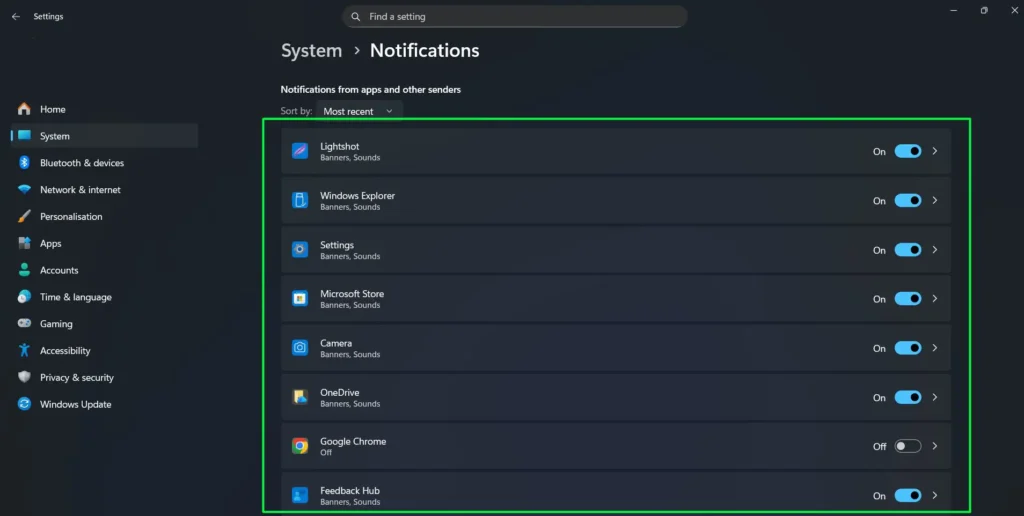
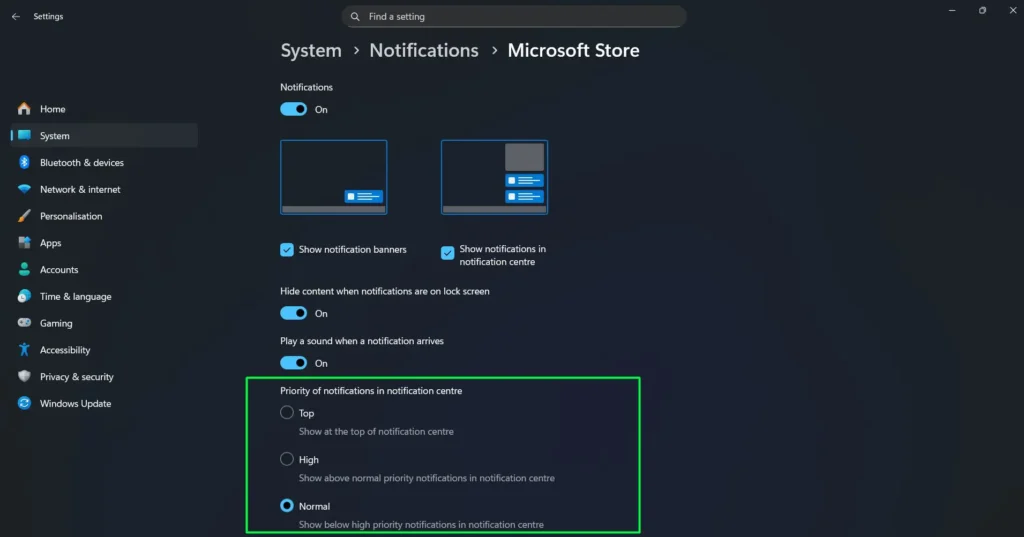
Step 6: Click any app to expand its individual settings. From there, adjust notification banners (the pop-up alerts), notification sounds, and whether alerts show up in the notification center.
Step 7: Finally, use the Priority dropdown (where available) to control whether certain app notifications rise to the top of the notification panel.
Most people find that turning off banners for low-priority apps – like email or social apps – while keeping sounds active for messaging apps gives the best balance between staying informed and avoiding constant interruptions.
For users who also want visual cues instead of audio alerts, this guide on how to get visual alerts instead of sounds on Windows offers a great complementary setup.
Managing Do Not Disturb and Focus From the Notification Center
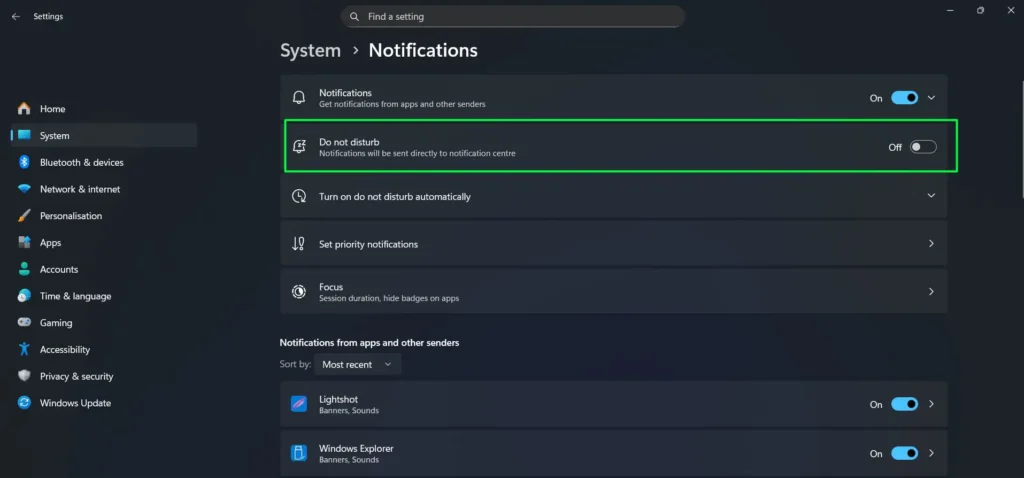
Windows 11 also includes a Do Not Disturb toggle that works alongside notification customization. When Do Not Disturb is active, Windows silences notification banners and sounds, but still stores all alerts in the notification center for review later.
Step 1: Click the date and time area in the bottom-right corner of the taskbar. This opens the notification center panel, which shows current alerts at the top and a calendar below.
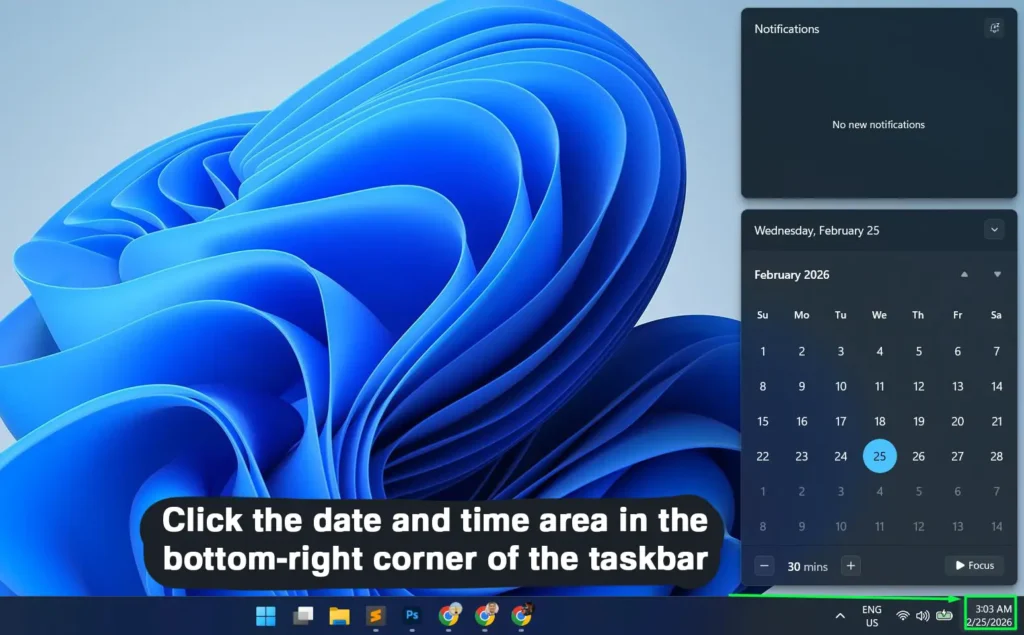
Step 2: At the top-right of the notification panel, look for the Do not disturb icon (a bell or settings-style icon). Click it to toggle Do Not Disturb on or off. A tooltip confirms the current state – for example, ‘Do not disturb: Off’.
Step 3: When active, Windows stops showing notification banners and silences alert sounds. All notifications still collect in the panel for review later.
Step 4: To use the Focus timer, look at the bottom of the same panel. Use the minus and plus buttons to set a duration (for example, 30 mins), then click the Focus button to start a focused session. During this time, Windows suppresses non-priority notifications automatically.

Step 5: To set automatic Do Not Disturb schedules, go to Settings > System > Notifications and scroll down to the Do not disturb section. From there, configure time-based rules as needed.
In addition, if capturing screenshots plays a part in a daily workflow alongside managing alerts, the Snipping Tool on Windows is a handy built-in option that pairs well with these notification settings.
Tips for Better Notification Management
- Prioritize messaging apps like Teams or WhatsApp so their notifications always rise to the top of the action center.
- For apps that send frequent, low-importance updates, turn off only the notification banners – this eliminates the pop-up without cutting off the notification entirely.
- During deep work sessions, activate the Focus feature to batch-review notifications later instead of dealing with constant interruptions.
- After major Windows updates, revisit notification settings – updates sometimes reset per-app preferences without warning.
- If an app does not appear in the notification list, launch it at least once first. Windows only adds apps to the notification control list after they run for the first time.
Pro-Tip: If a specific app sends too many notifications but turning it off completely is not an option, expand its settings under System > Notifications and disable only the banner and sound. That way, Windows still logs every alert in the notification center, but the app no longer interrupts with intrusive pop-ups.
Common Problems With Notification Settings in Windows 11
Notifications Not Appearing Even Though They Are Enabled
First, check whether Do Not Disturb or Focus mode is active in Quick Settings. Both modes suppress notification banners even when individual app notifications are on. Turning them off immediately restores normal alert behavior.
App Not Showing Up in the Notifications List
Windows adds an app to the notification settings list only after it runs at least once. So, launch the app first, then return to Settings > System > Notifications to find it in the list.
Quick Settings Panel Not Opening
When Quick Settings stops responding, restarting Windows Explorer usually fixes it. Right-click the taskbar, open Task Manager, find Windows Explorer under Processes, right-click it, and select Restart. This refreshes the taskbar and restores Quick Settings functionality right away.
Notification Settings Resetting After an Update
Windows updates occasionally reset notification preferences for certain apps. Because of this, after any major update, revisit Settings > System > Notifications and confirm that per-app settings still match the preferred configuration.
Frequently Asked Questions
How do you open Quick Settings in Windows 11?
Click the cluster of icons in the bottom-right corner of the taskbar – the ones showing Wi-Fi, volume, and battery status. Alternatively, press Windows key + A to open Quick Settings instantly from anywhere on the desktop.
Can notification settings be changed directly from Quick Settings?
Quick Settings does not show per-app notification toggles directly inside the panel. However, it does provide a fast shortcut to the full notification settings through the gear icon at the bottom. From there, all notification controls become accessible.
What is the difference between Do Not Disturb and turning off notifications in Windows 11?
Do Not Disturb silences banners and sounds temporarily, but Windows still logs all notifications in the notification center for later review. In contrast, turning off notifications for an app stops it from generating any alerts at all – nothing appears anywhere until the toggle turns back on.
How do you stop a specific app from showing notification pop-ups without turning it off completely?
Go to Settings > System > Notifications, click the specific app, and then turn off the Show notification banners toggle. After that, the app continues logging notifications in the action center but no longer triggers any pop-up banners.
Does Windows 11 Quick Settings allow adding a notification shortcut tile?
Quick Settings supports various tiles such as Focus and Accessibility shortcuts, but there is no dedicated ‘Notification settings’ tile available. Instead, the gear icon inside Quick Settings serves as the fastest shortcut to all system settings, including notifications.