Headphones are our constant companions, whether we’re commuting, working out, or enjoying our favorite tunes at home. Over time, they can accumulate dirt, sweat, and grime, which can not only affect their performance but also pose hygiene issues. Cleaning your headphones regularly will enhance their longevity and keep your listening experience pristine. Here’s your ultimate guide to cleaning headphones, no matter the type!
Why Clean Your Headphones?
- Hygiene: Sweat, oils, and bacteria can build up, especially if you use them during workouts or long commutes.
- Sound Quality: Dirt can clog speakers and muffle sound.
- Durability: Regular maintenance can extend the lifespan of your headphones.
What You’ll Need
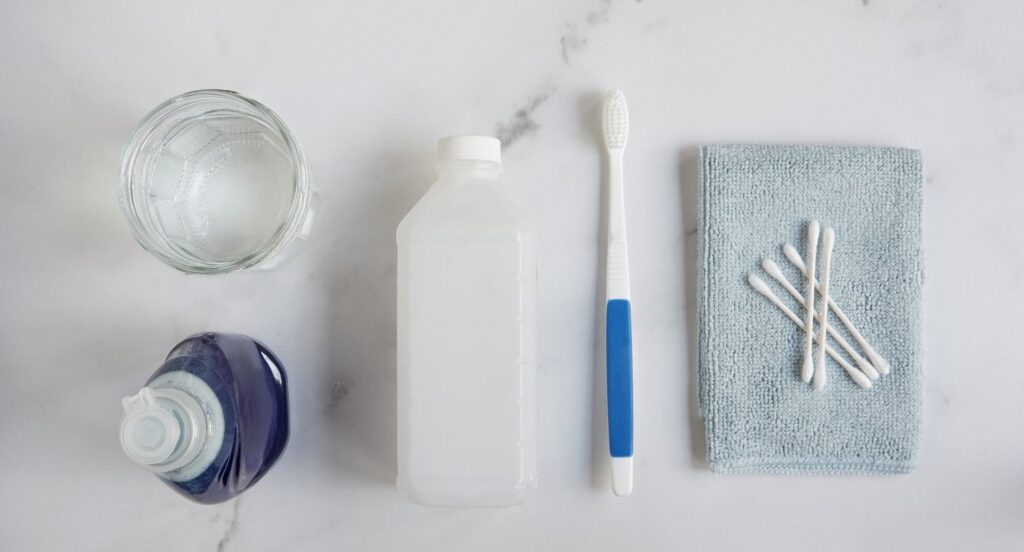
- Soft, lint-free cloths
- Cotton swabs
- Isopropyl alcohol (70% or higher)
- Mild soap
- Water
- Microfiber cloth (optional)
- Compressed air (for over-ear headphones)
Step-by-Step Cleaning Guide
1. Unplug and Disassemble
Start by unplugging your headphones and removing any detachable parts, such as ear pads or cables. Refer to your manufacturer’s instructions for disassembly.
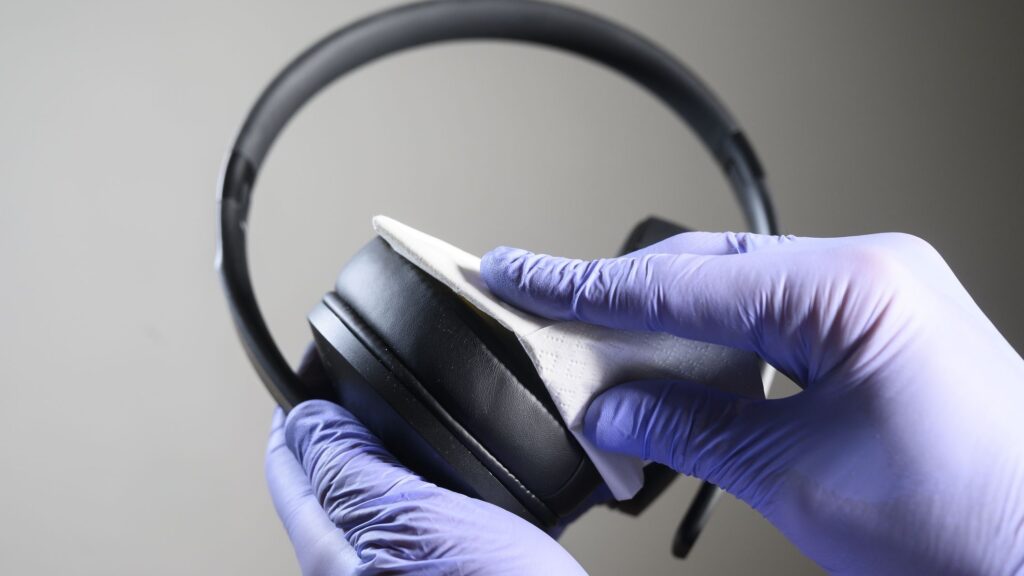
2. Clean the Ear Pads
- Foam/Padded Ear Pads: Wipe them gently with a cloth dampened with a mix of mild soap and water. Avoid soaking them. For stubborn stains, use a cotton swab with a bit of isopropyl alcohol. Let them air dry completely before reattaching.
- Leather Ear Pads: Wipe them with a slightly damp cloth. If necessary, use a leather cleaner according to the product instructions.
3. Clean the Headband
Using a damp cloth with a mild soap solution, wipe the headband. If it’s made of leather, consider using a dedicated leather cleaner.
4. Clean the Mesh Screens
Use a dry toothbrush or a soft-bristle brush to gently sweep away debris from the mesh screen. Be careful not to push dirt further into the speaker. For stubborn grime, you can use a cotton swab lightly moistened with isopropyl alcohol.
5. Clean the Cables and Connectors
Wipe the cables with a damp cloth. Pay special attention to the connectors; use a cotton swab dipped in isopropyl alcohol to clean the jack. This helps remove any buildup that could affect connectivity.
6. Dry Everything Thoroughly
Ensure all parts are completely dry before reassembling your headphones. Moisture can damage electronic components.
7. Final Touch-Up
For over-ear headphones, use compressed air to blow out any dust or debris in crevices.
Additional Tips
- Frequency: Aim to clean your headphones every few weeks, or more often if you use them heavily.
- Storage: Store them in a case when not in use to protect them from dust and damage.
- Avoid Harsh Chemicals: Always stick to mild cleaners; harsh chemicals can damage the materials.
CMoy Amp Kit: A DIY Headphone Amplifier Kit
Conclusion
Cleaning your headphones is a simple yet vital part of maintaining them. With just a few tools and some regular care, you can ensure that your headphones not only sound great but also stay hygienic. Follow these steps, and your ears will thank you for many listening sessions to come! Happy cleaning!